WordPress Quick Start
Get started with Synoveo on WordPress in 5 minutes
Connect your WordPress site to Google Business Profile and start syncing automatically.
Prerequisites
Before you begin, make sure you have:
- A WordPress site (5.8 or higher)
- A Google Business Profile account
- Admin access to your WordPress site
Step 1: Install the Plugin
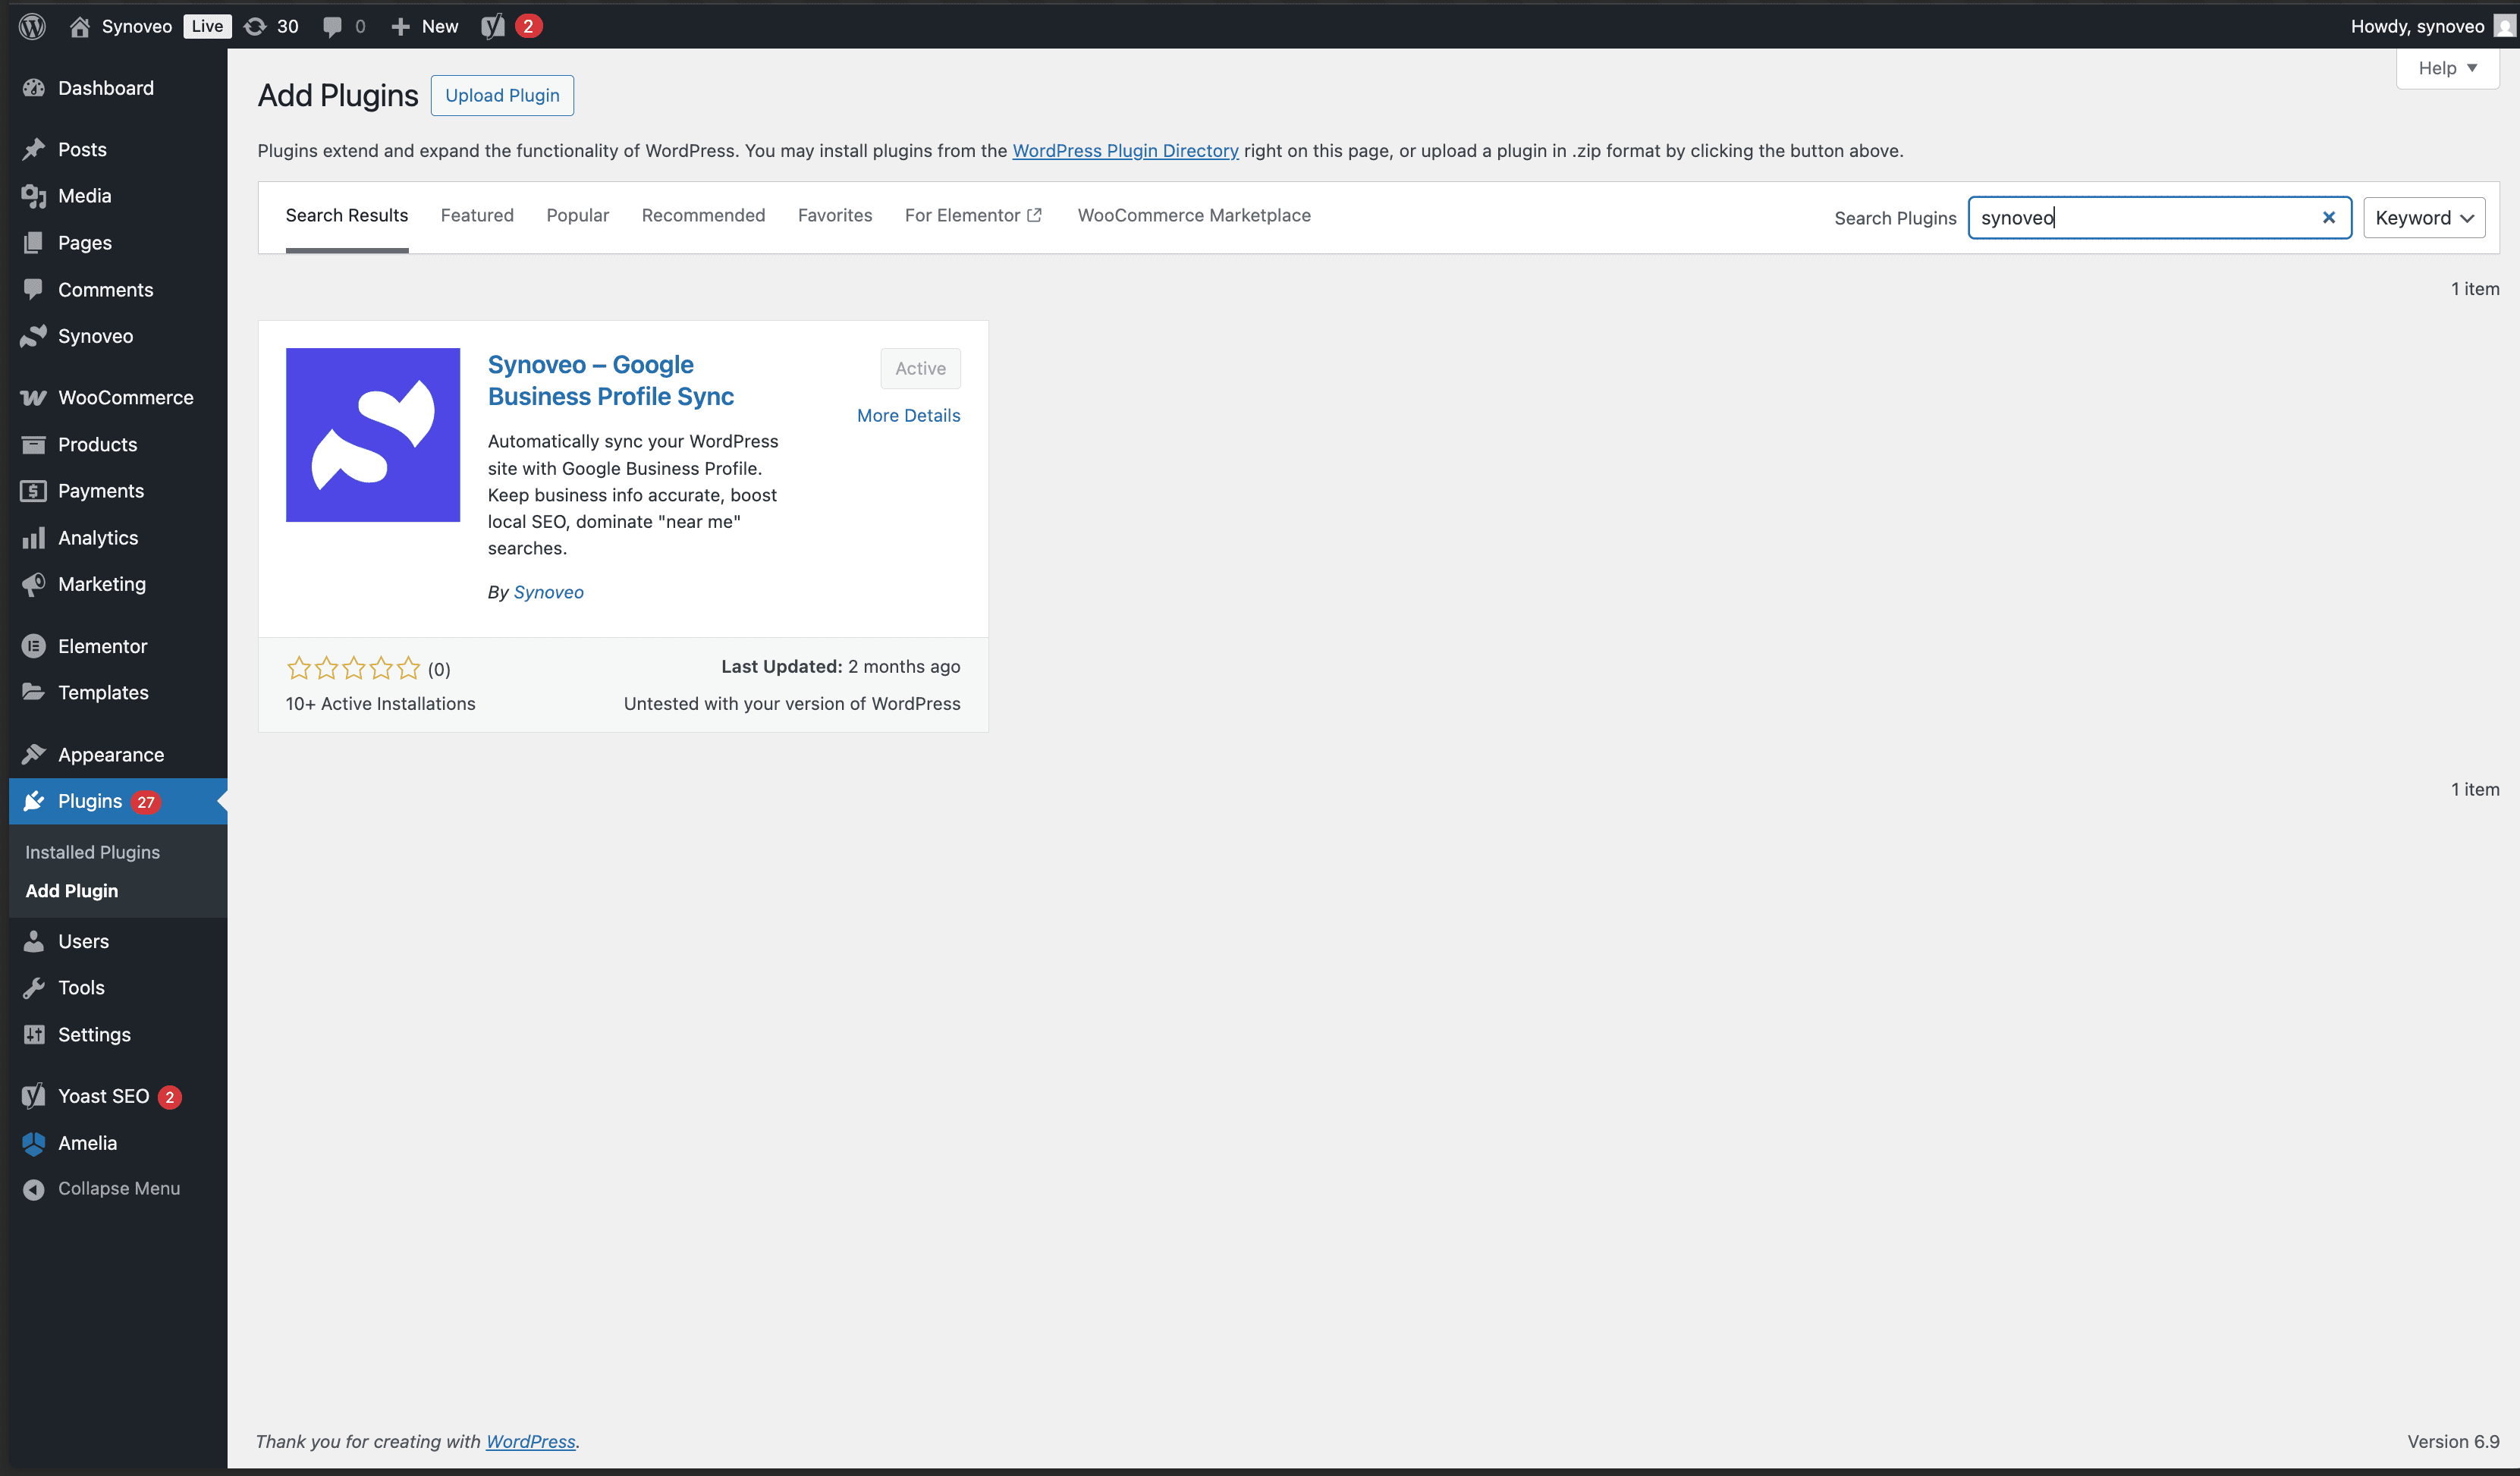
In your WordPress admin, navigate to Plugins → Add New and search for "Synoveo".
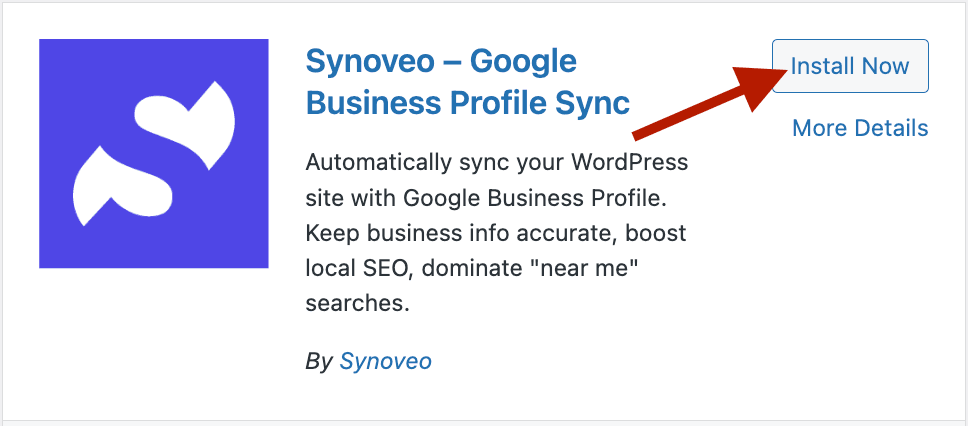
Click Install Now, then Activate.
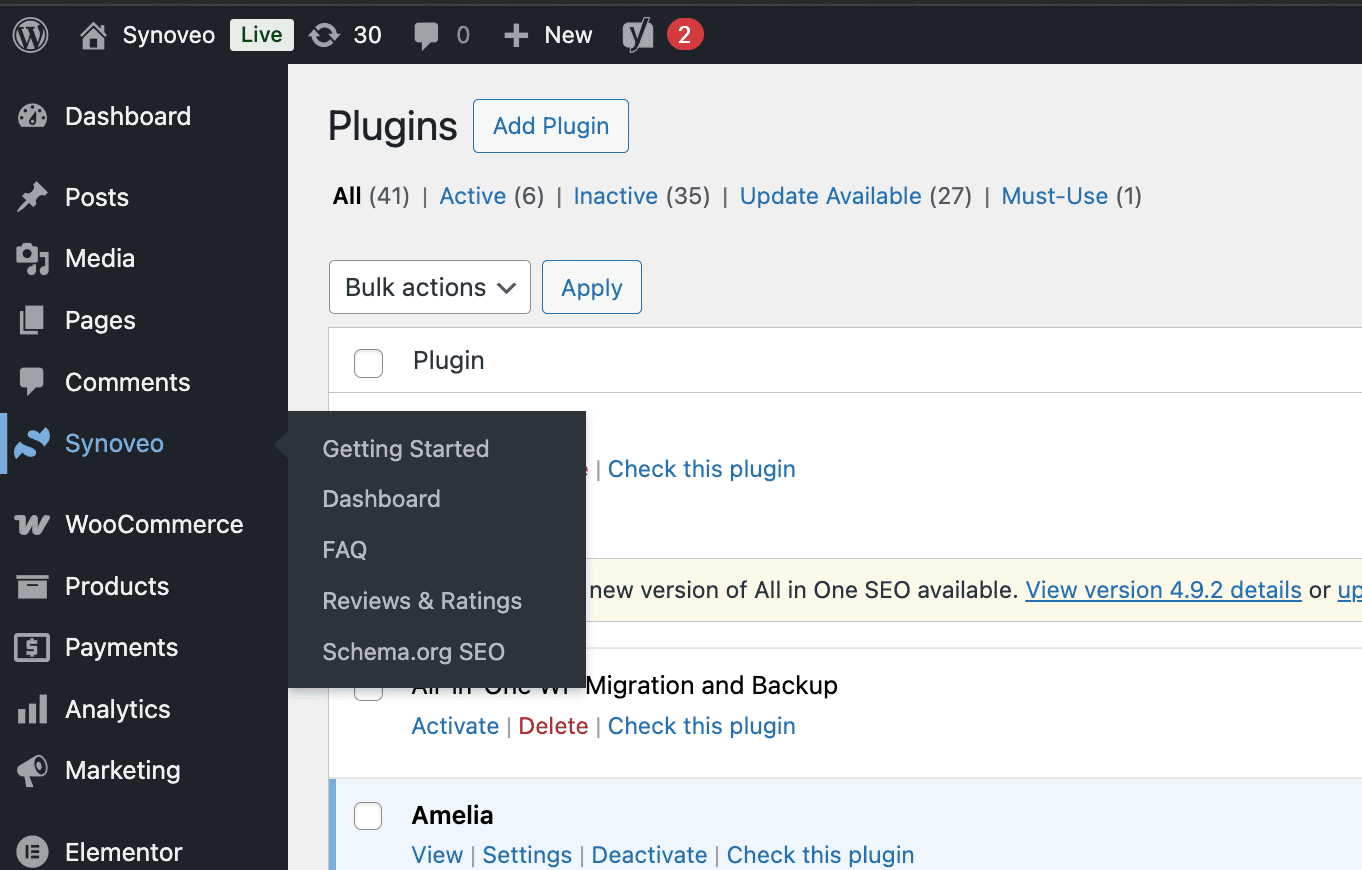
After activation, you'll see the Synoveo menu in your sidebar:
Step 2: Sign in to Synoveo Hub
Go to app.synoveo.com and sign in with your Google account.
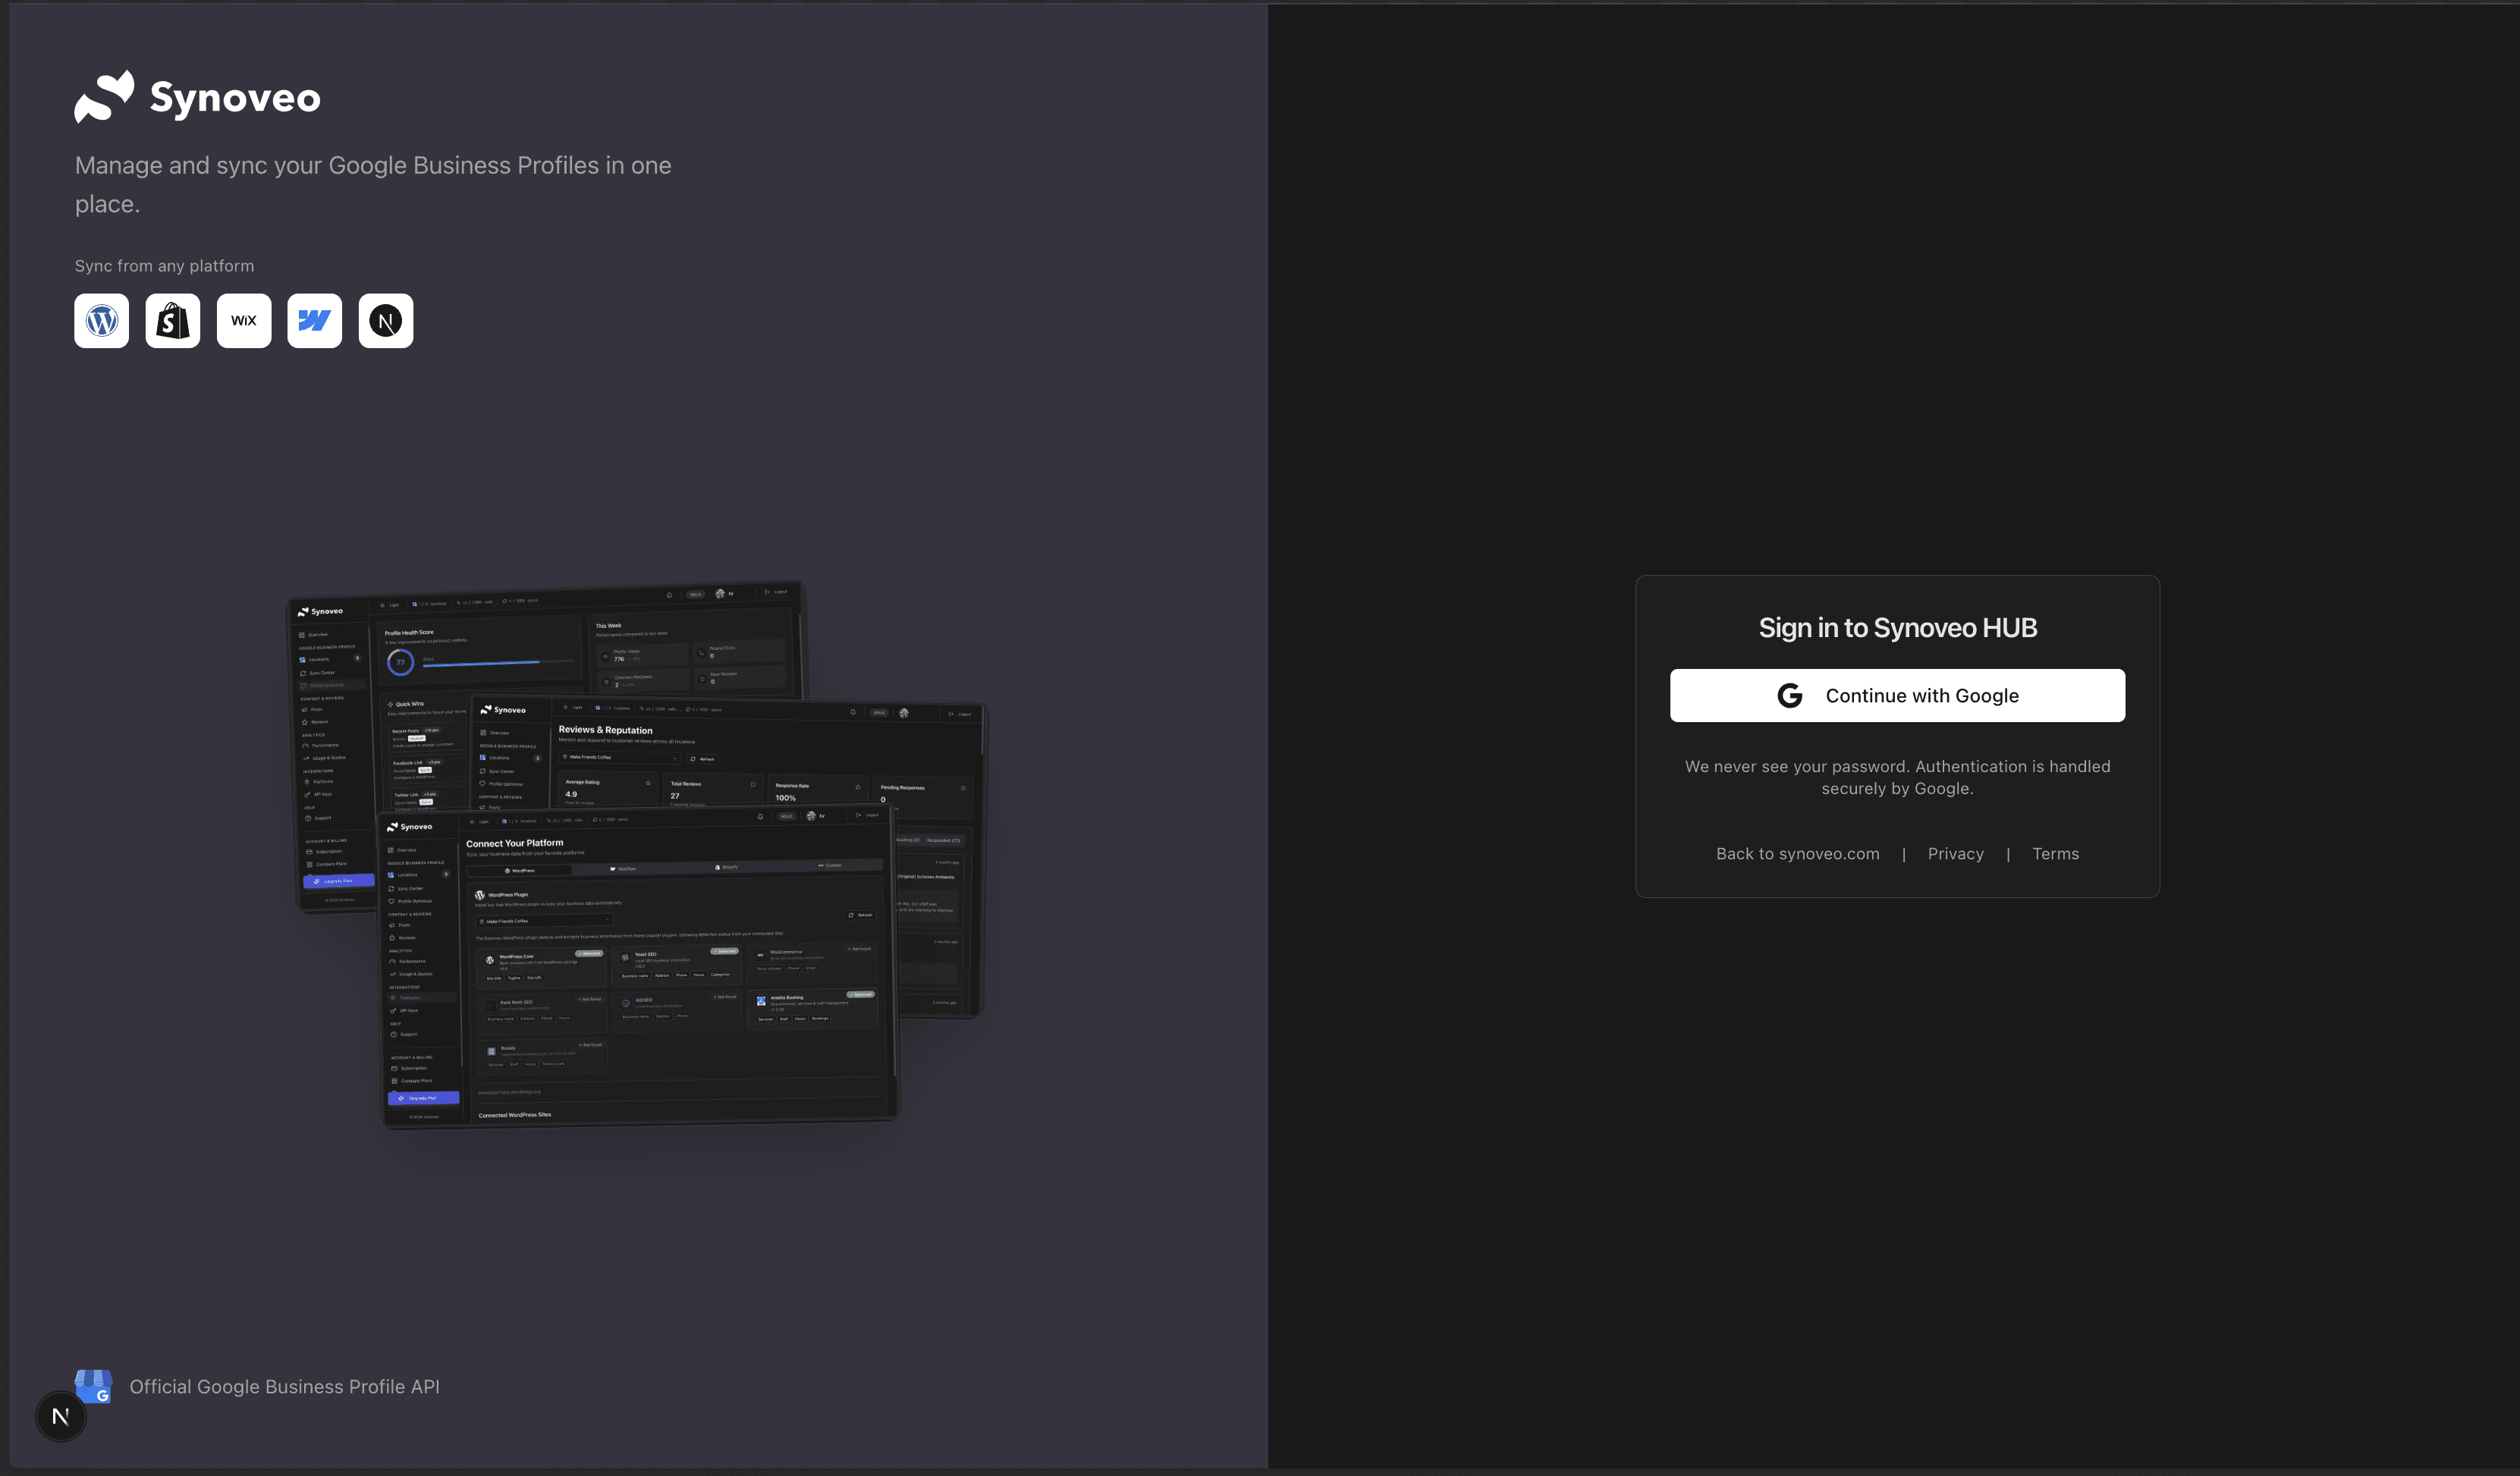
Synoveo uses Google OAuth. No separate registration required - just sign in with Google.
Step 3: Enable Location Sync
Navigate to Locations in the Hub. Find your location and toggle Sync to ON.
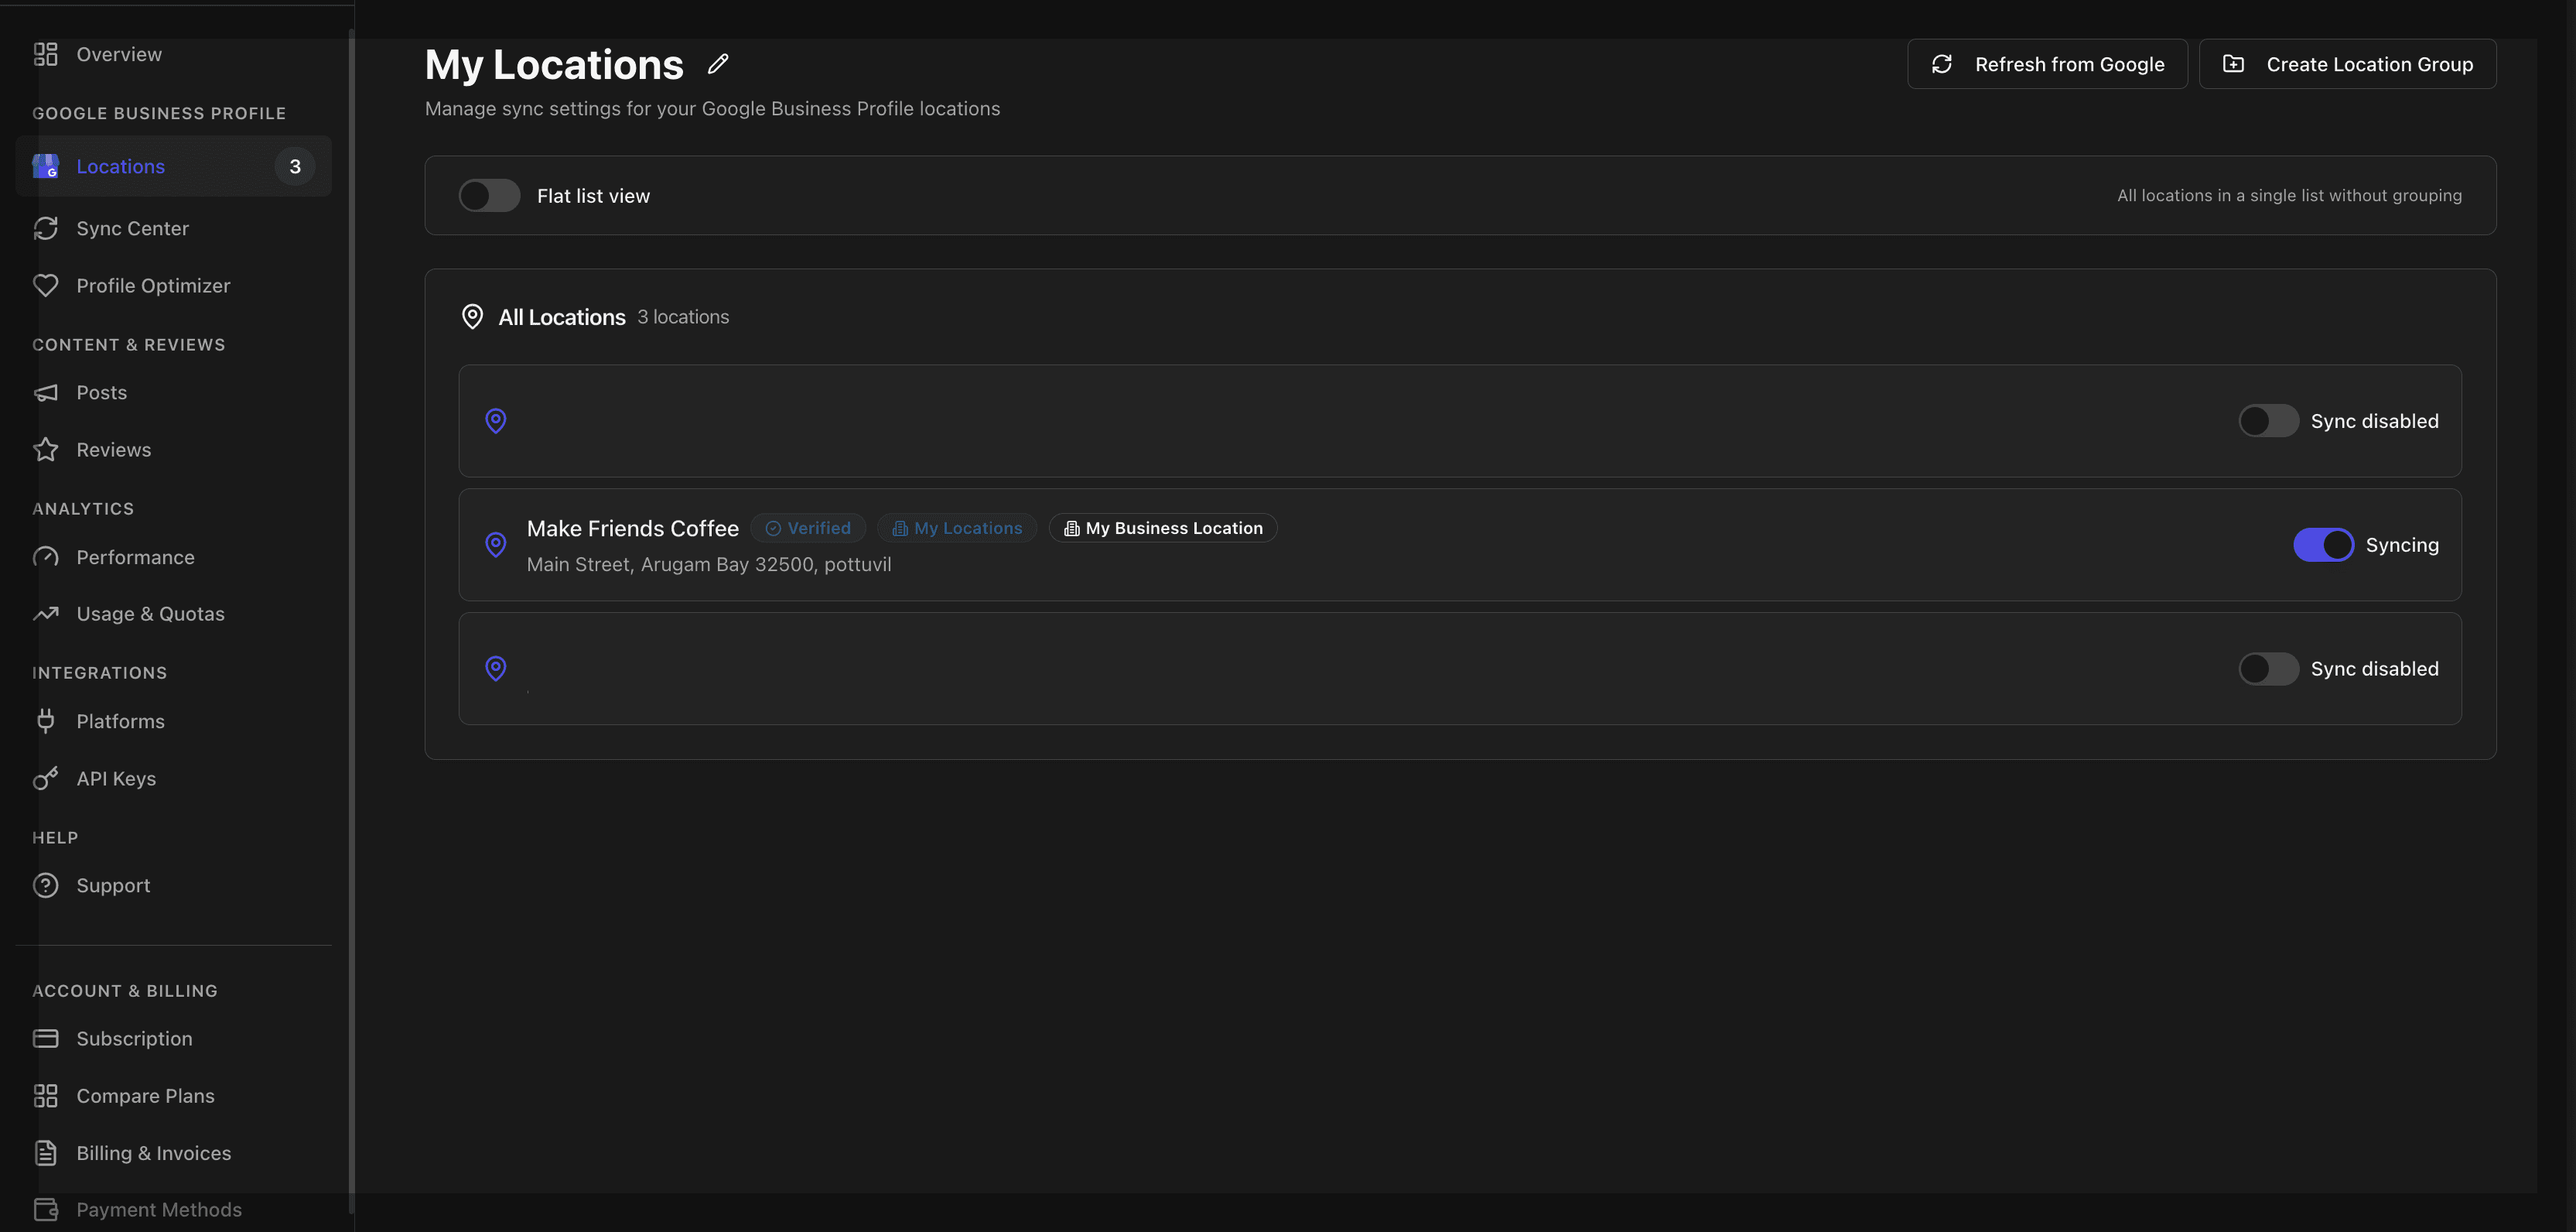
Your location must have sync enabled before you can create an API key for it.
Step 4: Create API Credentials
Go to API Keys and click Create API Key.
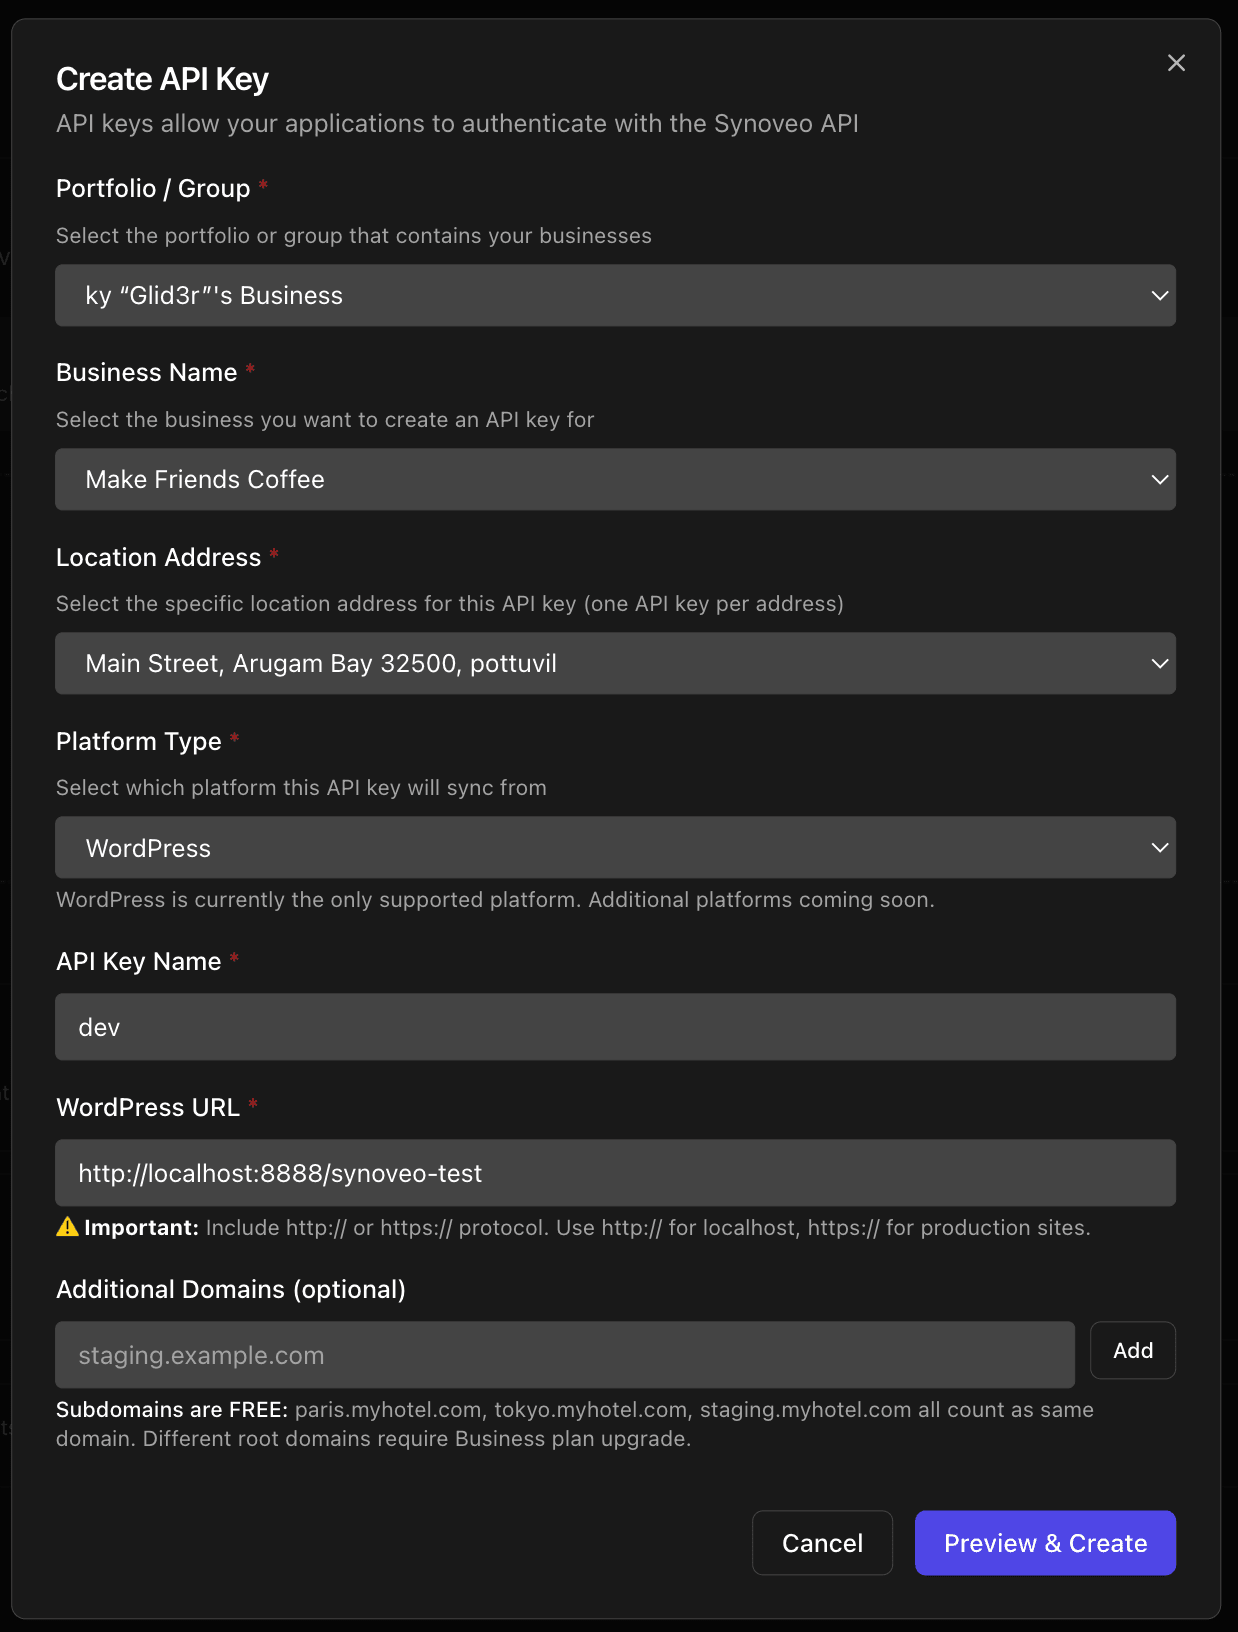
Configure:
- Platform: WordPress
- Location: Your Google location (only sync-enabled locations appear)
- Domain: Your WordPress site URL
Confirm the creation:
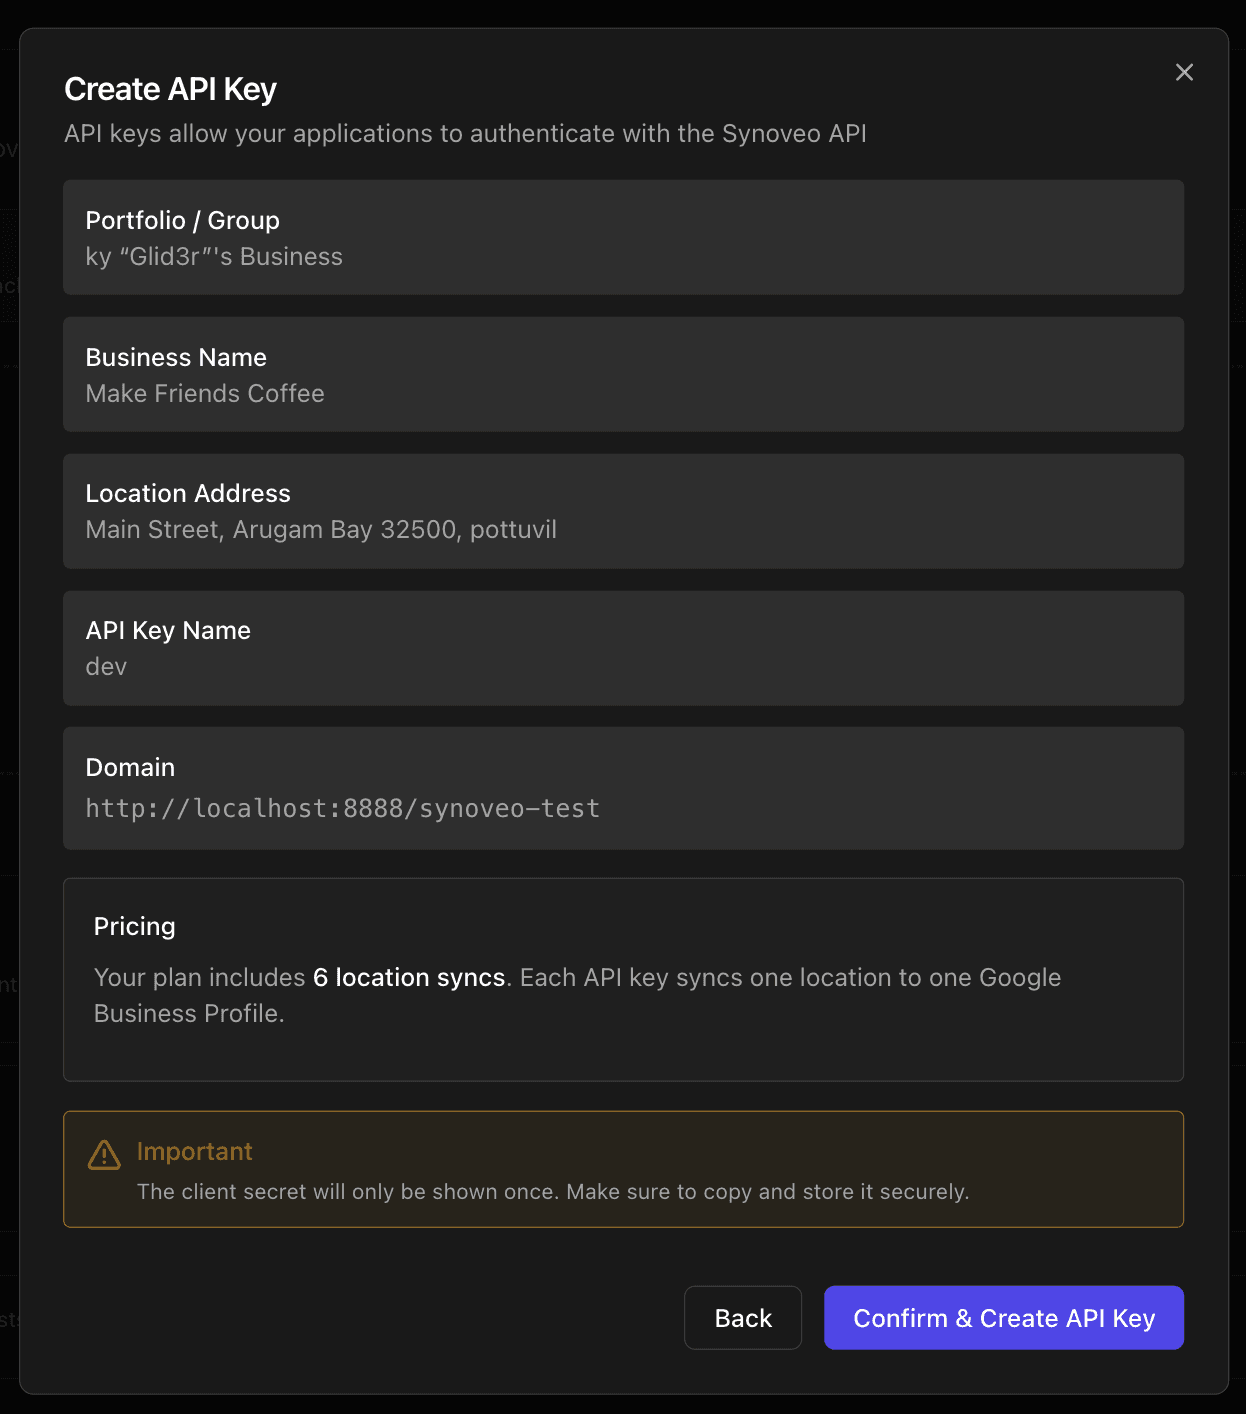
Copy your Client ID and Client Secret:

Save your Client Secret now - it's only shown once!
Step 5: Connect WordPress
In WordPress, go to Synoveo → Dashboard:
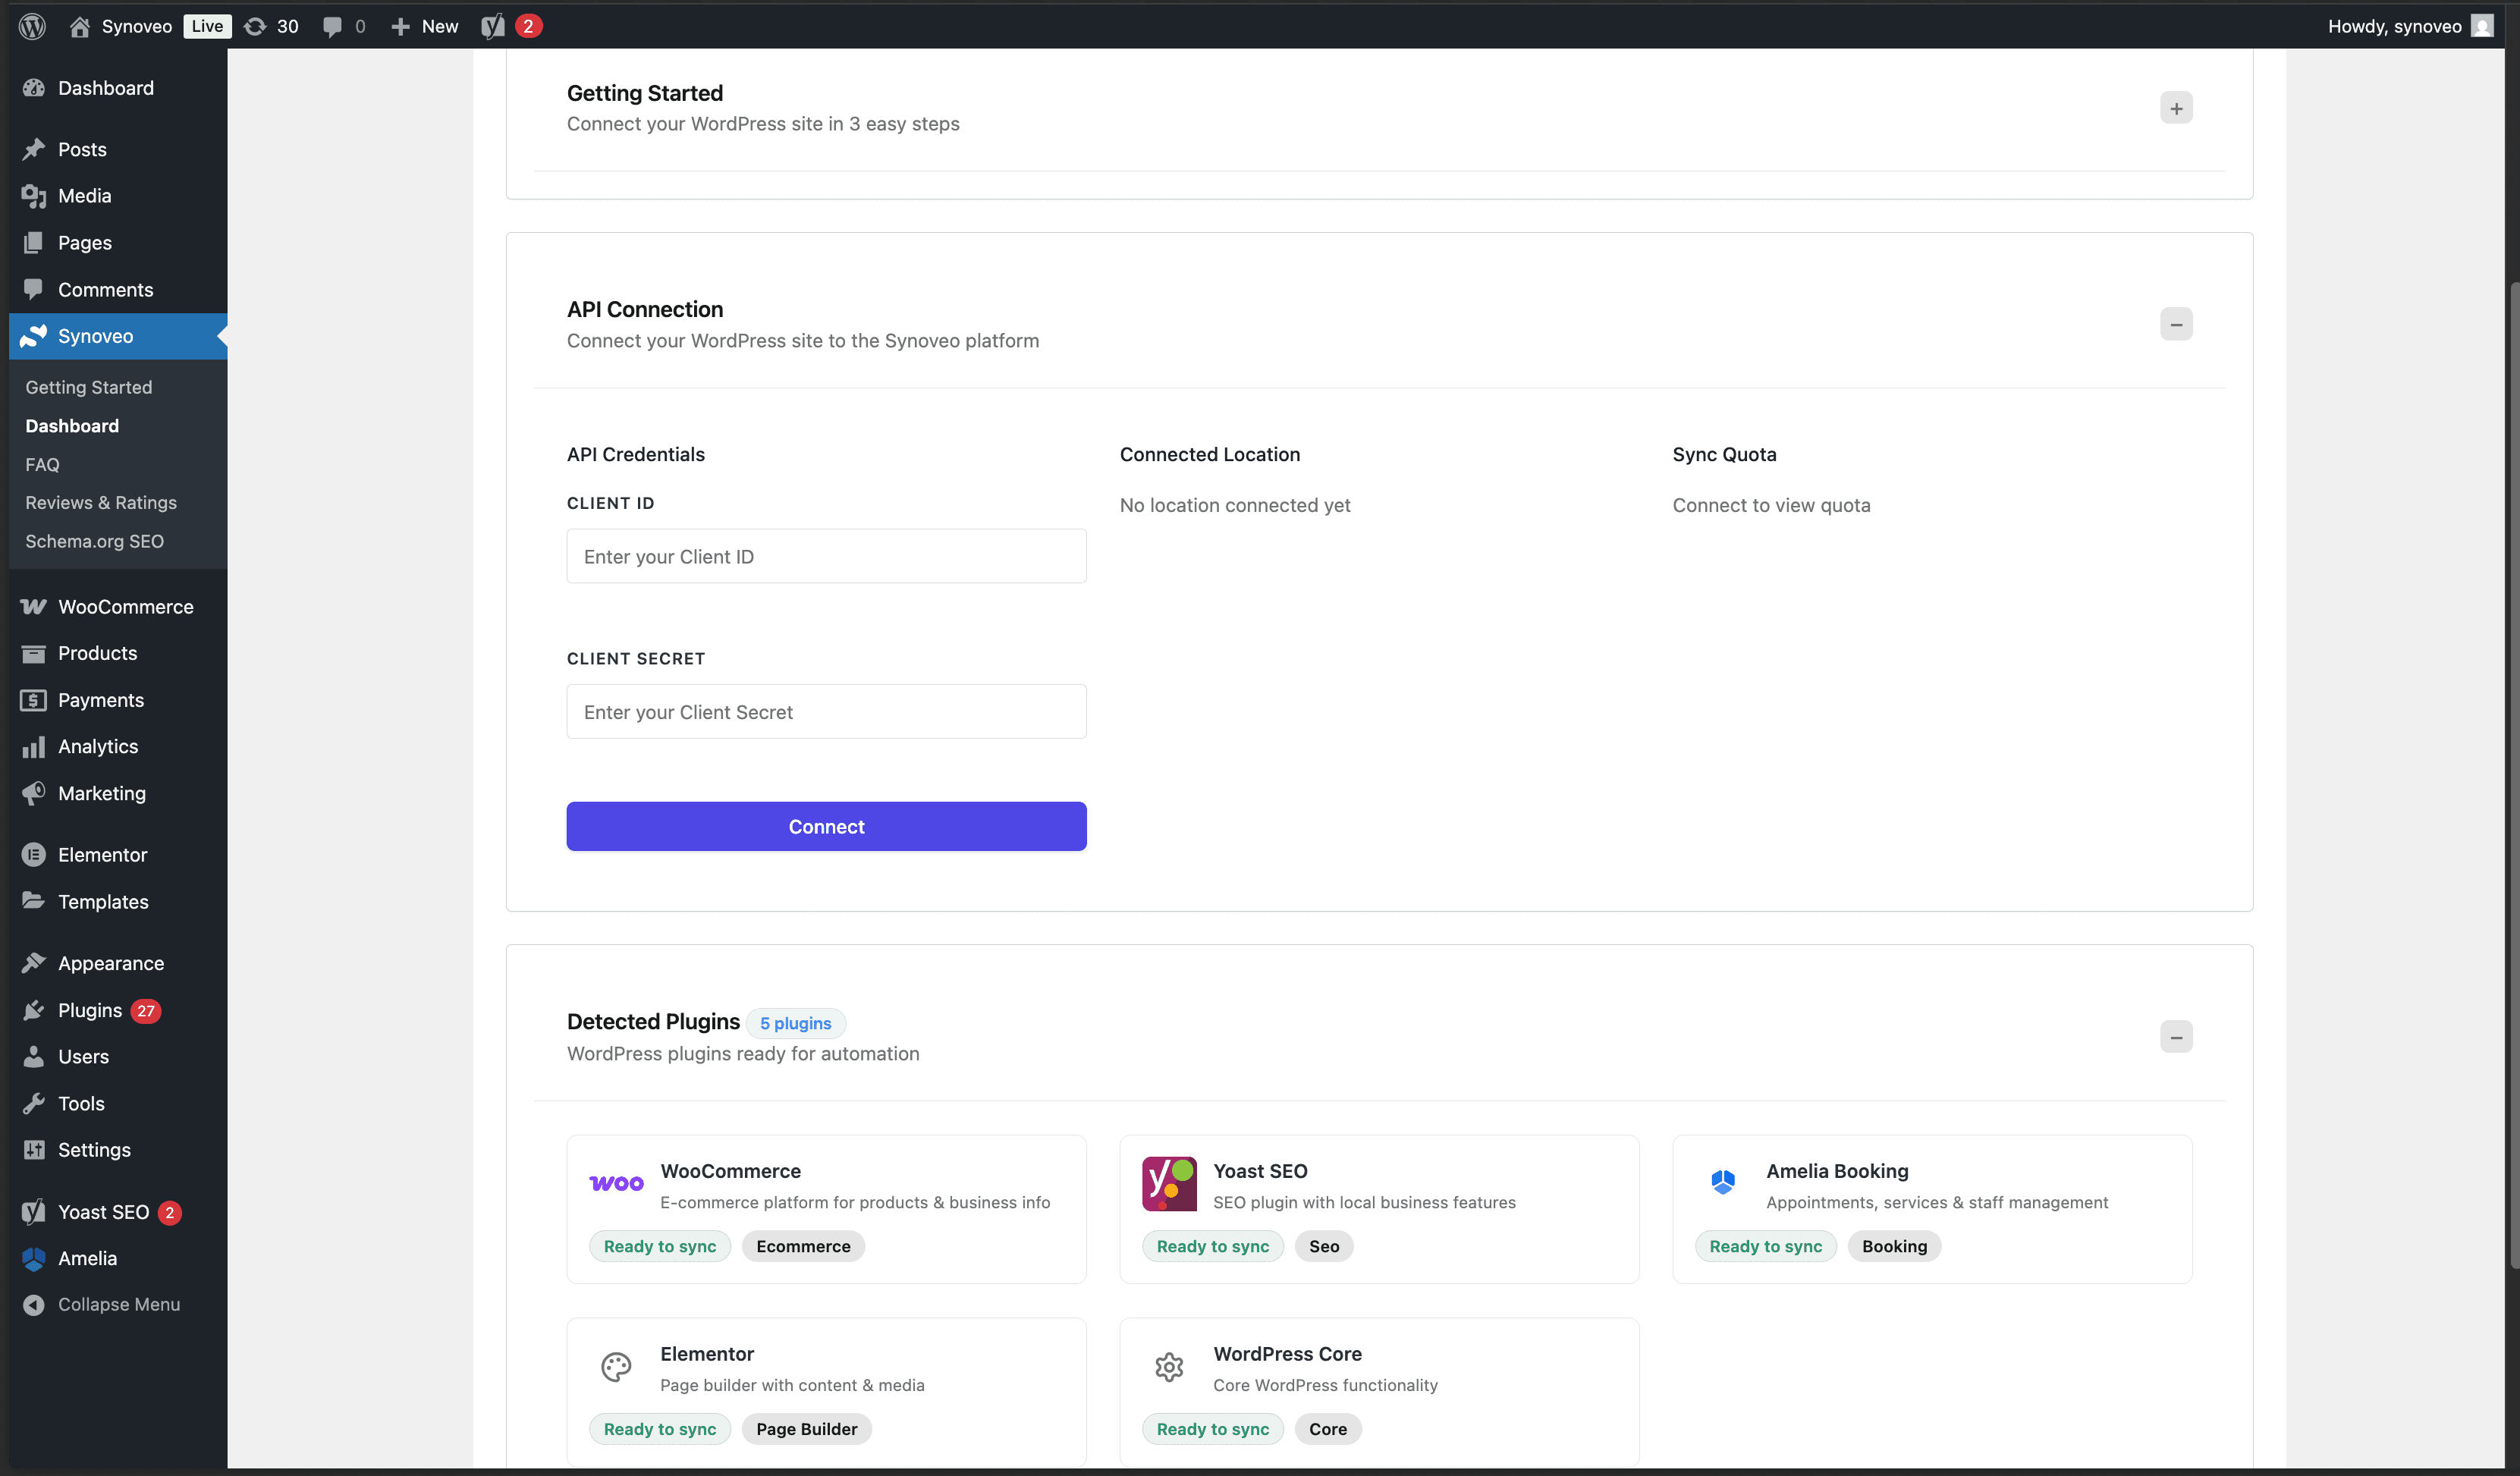
Enter your credentials:
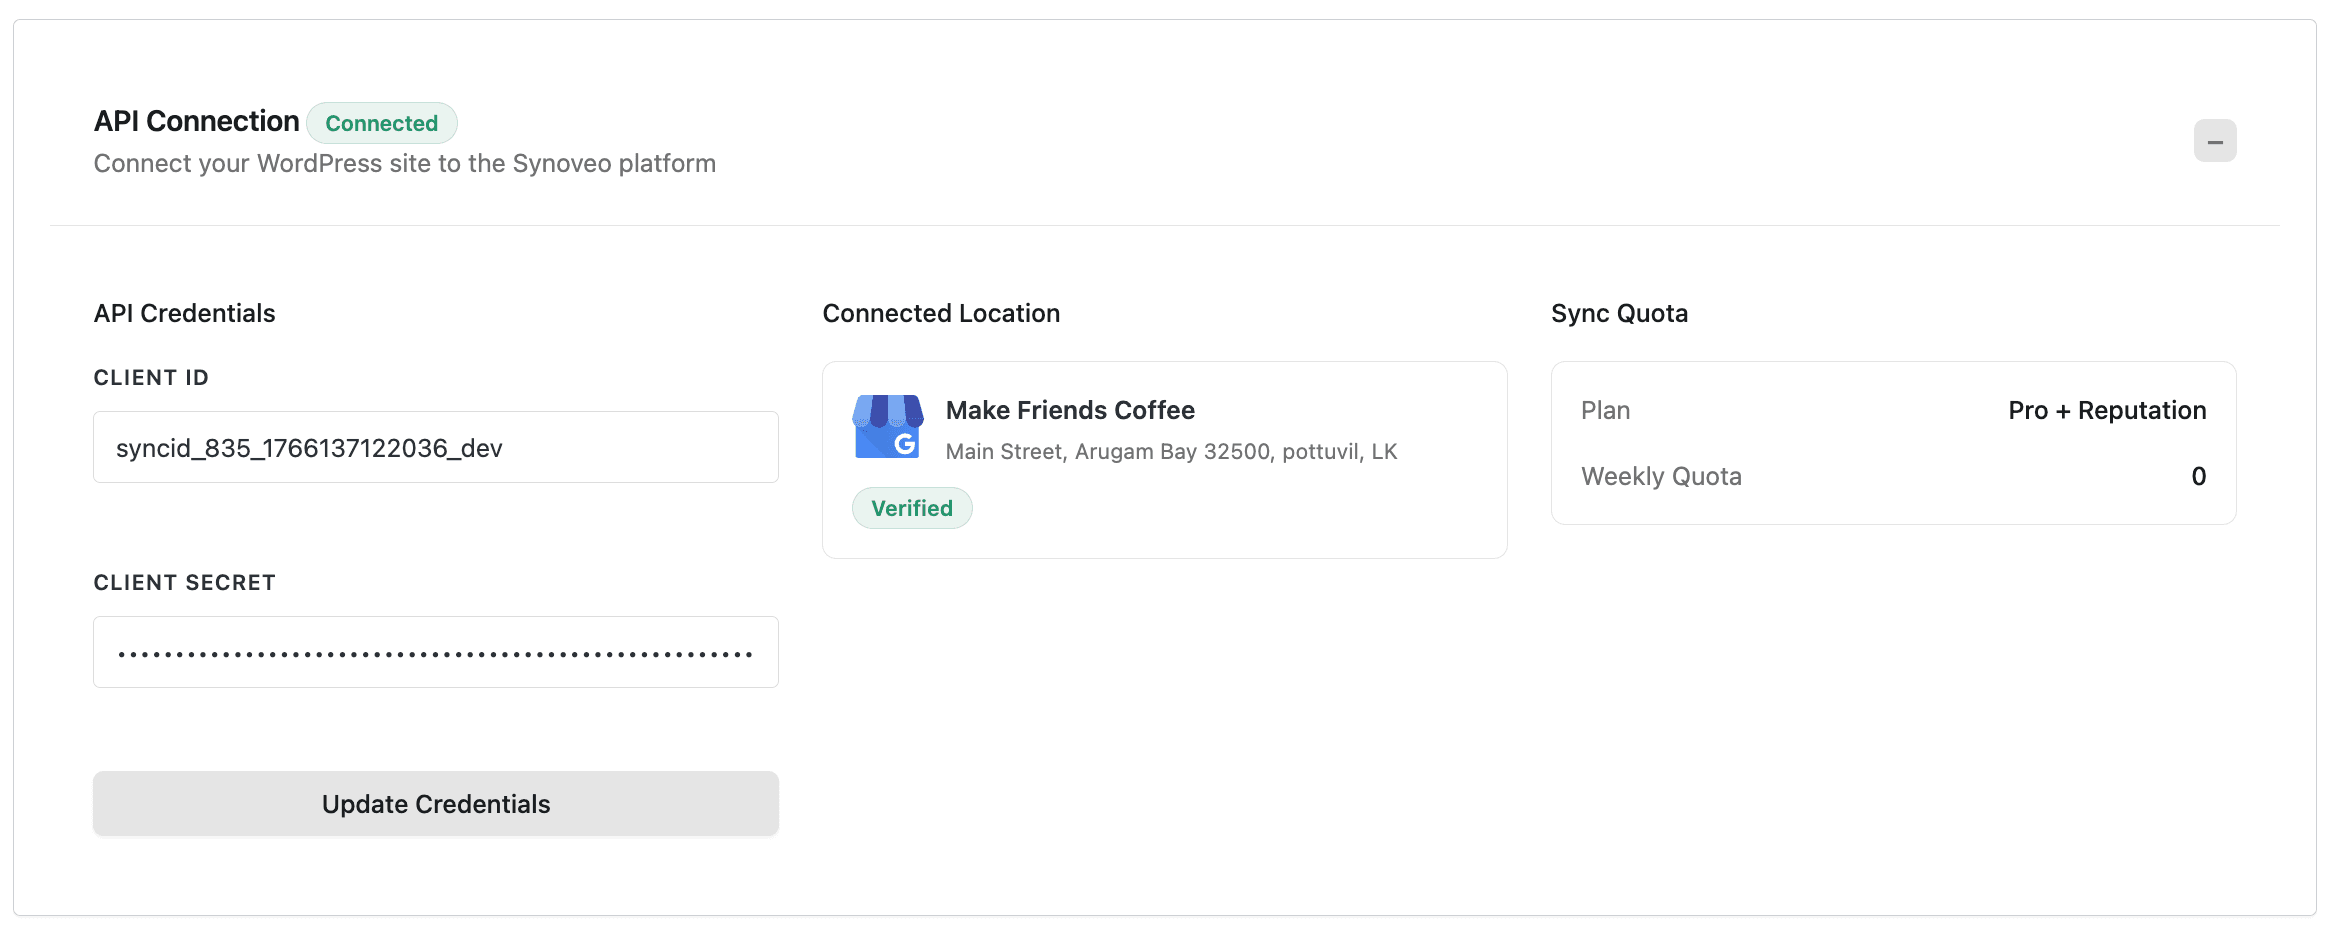
Click Connect. You should see the connected state:

Step 6: Sync Your Data
Click Sync Now to send your WordPress data to Google Business Profile.
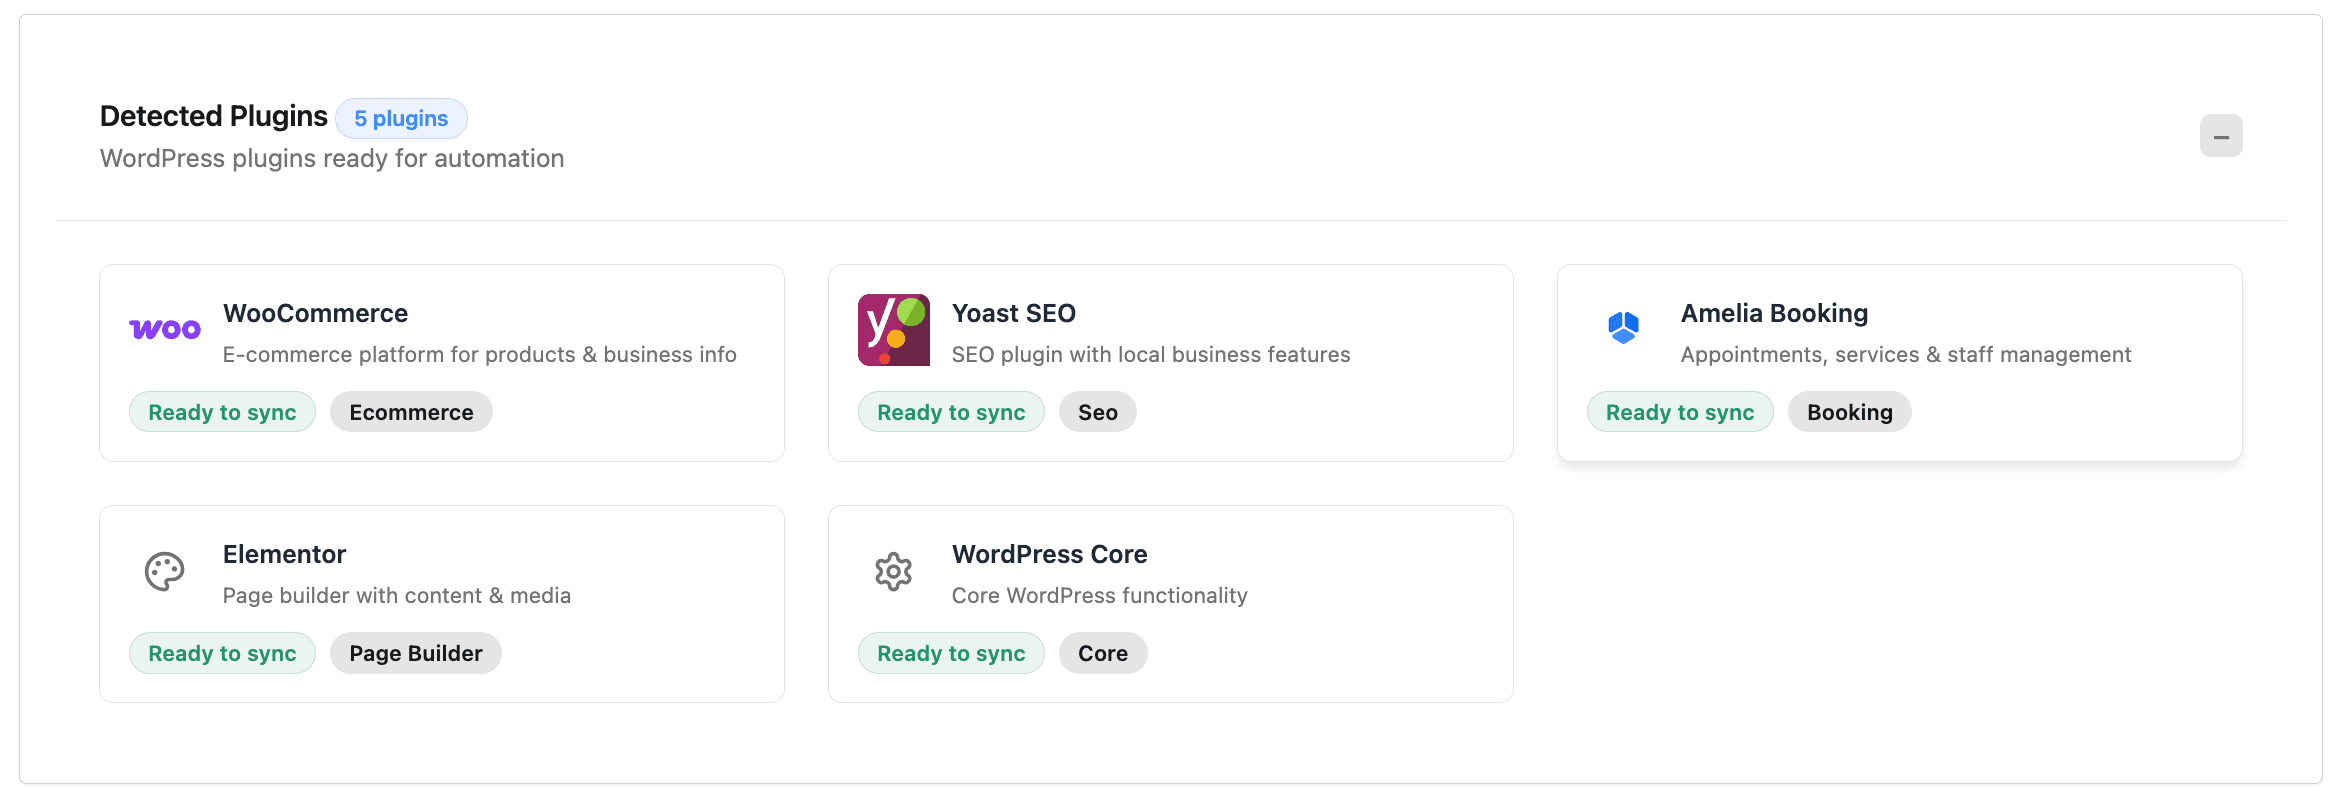
Synoveo automatically detects data from popular plugins:
You're Done!
Your WordPress site is now connected to Google Business Profile. Synoveo will:
- Keep your business info synchronized
- Auto-detect changes from plugins like WooCommerce, Yoast, Rank Math
- Optionally auto-post content to Google