Auto-Post to Google
Automatically publish WordPress posts to Google Business Profile
Turn your WordPress content into Google Business Profile posts automatically. Write once, reach customers on both your website and Google Search.
What is Auto-Post?
Auto-Post bridges WordPress and Google Business Profile. When you publish a blog post, product update, or promotion in WordPress, Synoveo automatically creates a matching post on your Google Business Profile.
WordPress Post  →  Synoveo  →  Google Business Profile Post
   (Your blog)      (Bridge)      (Appears in Google Search)
Why Use Auto-Post?
| Benefit | Description |
|---|---|
| Save time | No manual copy-paste between platforms |
| Stay visible | Keep your GBP profile active and fresh |
| Reach more customers | Your content appears in Google Search & Maps |
| Consistent branding | Templates ensure uniform formatting |
How Google Business Profile Posts Work
Before setting up Auto-Post, understand what Google expects.
Post Types
Google supports three post types. Choose based on your content:
| Type | Use For | Duration | Special Fields |
|---|---|---|---|
| Update | News, tips, announcements | 7 days | None |
| Event | Workshops, webinars, sales | Until end date | Duration, times |
| Offer | Discounts, promotions | Until end date | Coupon code, terms |
Content Limits
Google enforces strict limits:
| Field | Limit |
|---|---|
| Post text | 1,500 characters |
| Event title | 58 characters |
| Coupon code | 50 characters |
| Terms & conditions | 500 characters |
Required Elements
Every GBP post needs:
- Text content - Your message to customers
- Post type - Update, Event, or Offer
Optional but recommended:
- Image - Posts with images get 2x more engagement
- Call-to-action button - Learn More, Book, Shop, etc.
Requirements
Before using Auto-Post:
Auto-Post requires the Engagement Bundle add-on or higher plan.
- Active Synoveo subscription with Engagement Bundle
- Verified Google Business Profile location
- Sync enabled for the location
- WordPress API key created and assigned to the location
Setup Overview
Auto-Post has two configuration layers:
| Layer | Where | Who | What |
|---|---|---|---|
| Templates | Synoveo Dashboard | Admin (once) | How posts look |
| Per-post | WordPress Editor | Editor (each post) | What posts contain |
This separation lets admins control branding while editors focus on content.
Step 1: Dashboard Setup
Configure templates and enable Auto-Post in your Synoveo dashboard.
1.1 Navigate to Marketing Hub
- Log in to app.synoveo.com
- Go to Posts in the sidebar (opens the Marketing Hub)
- Select the Posts tab
- Choose your location from the dropdown
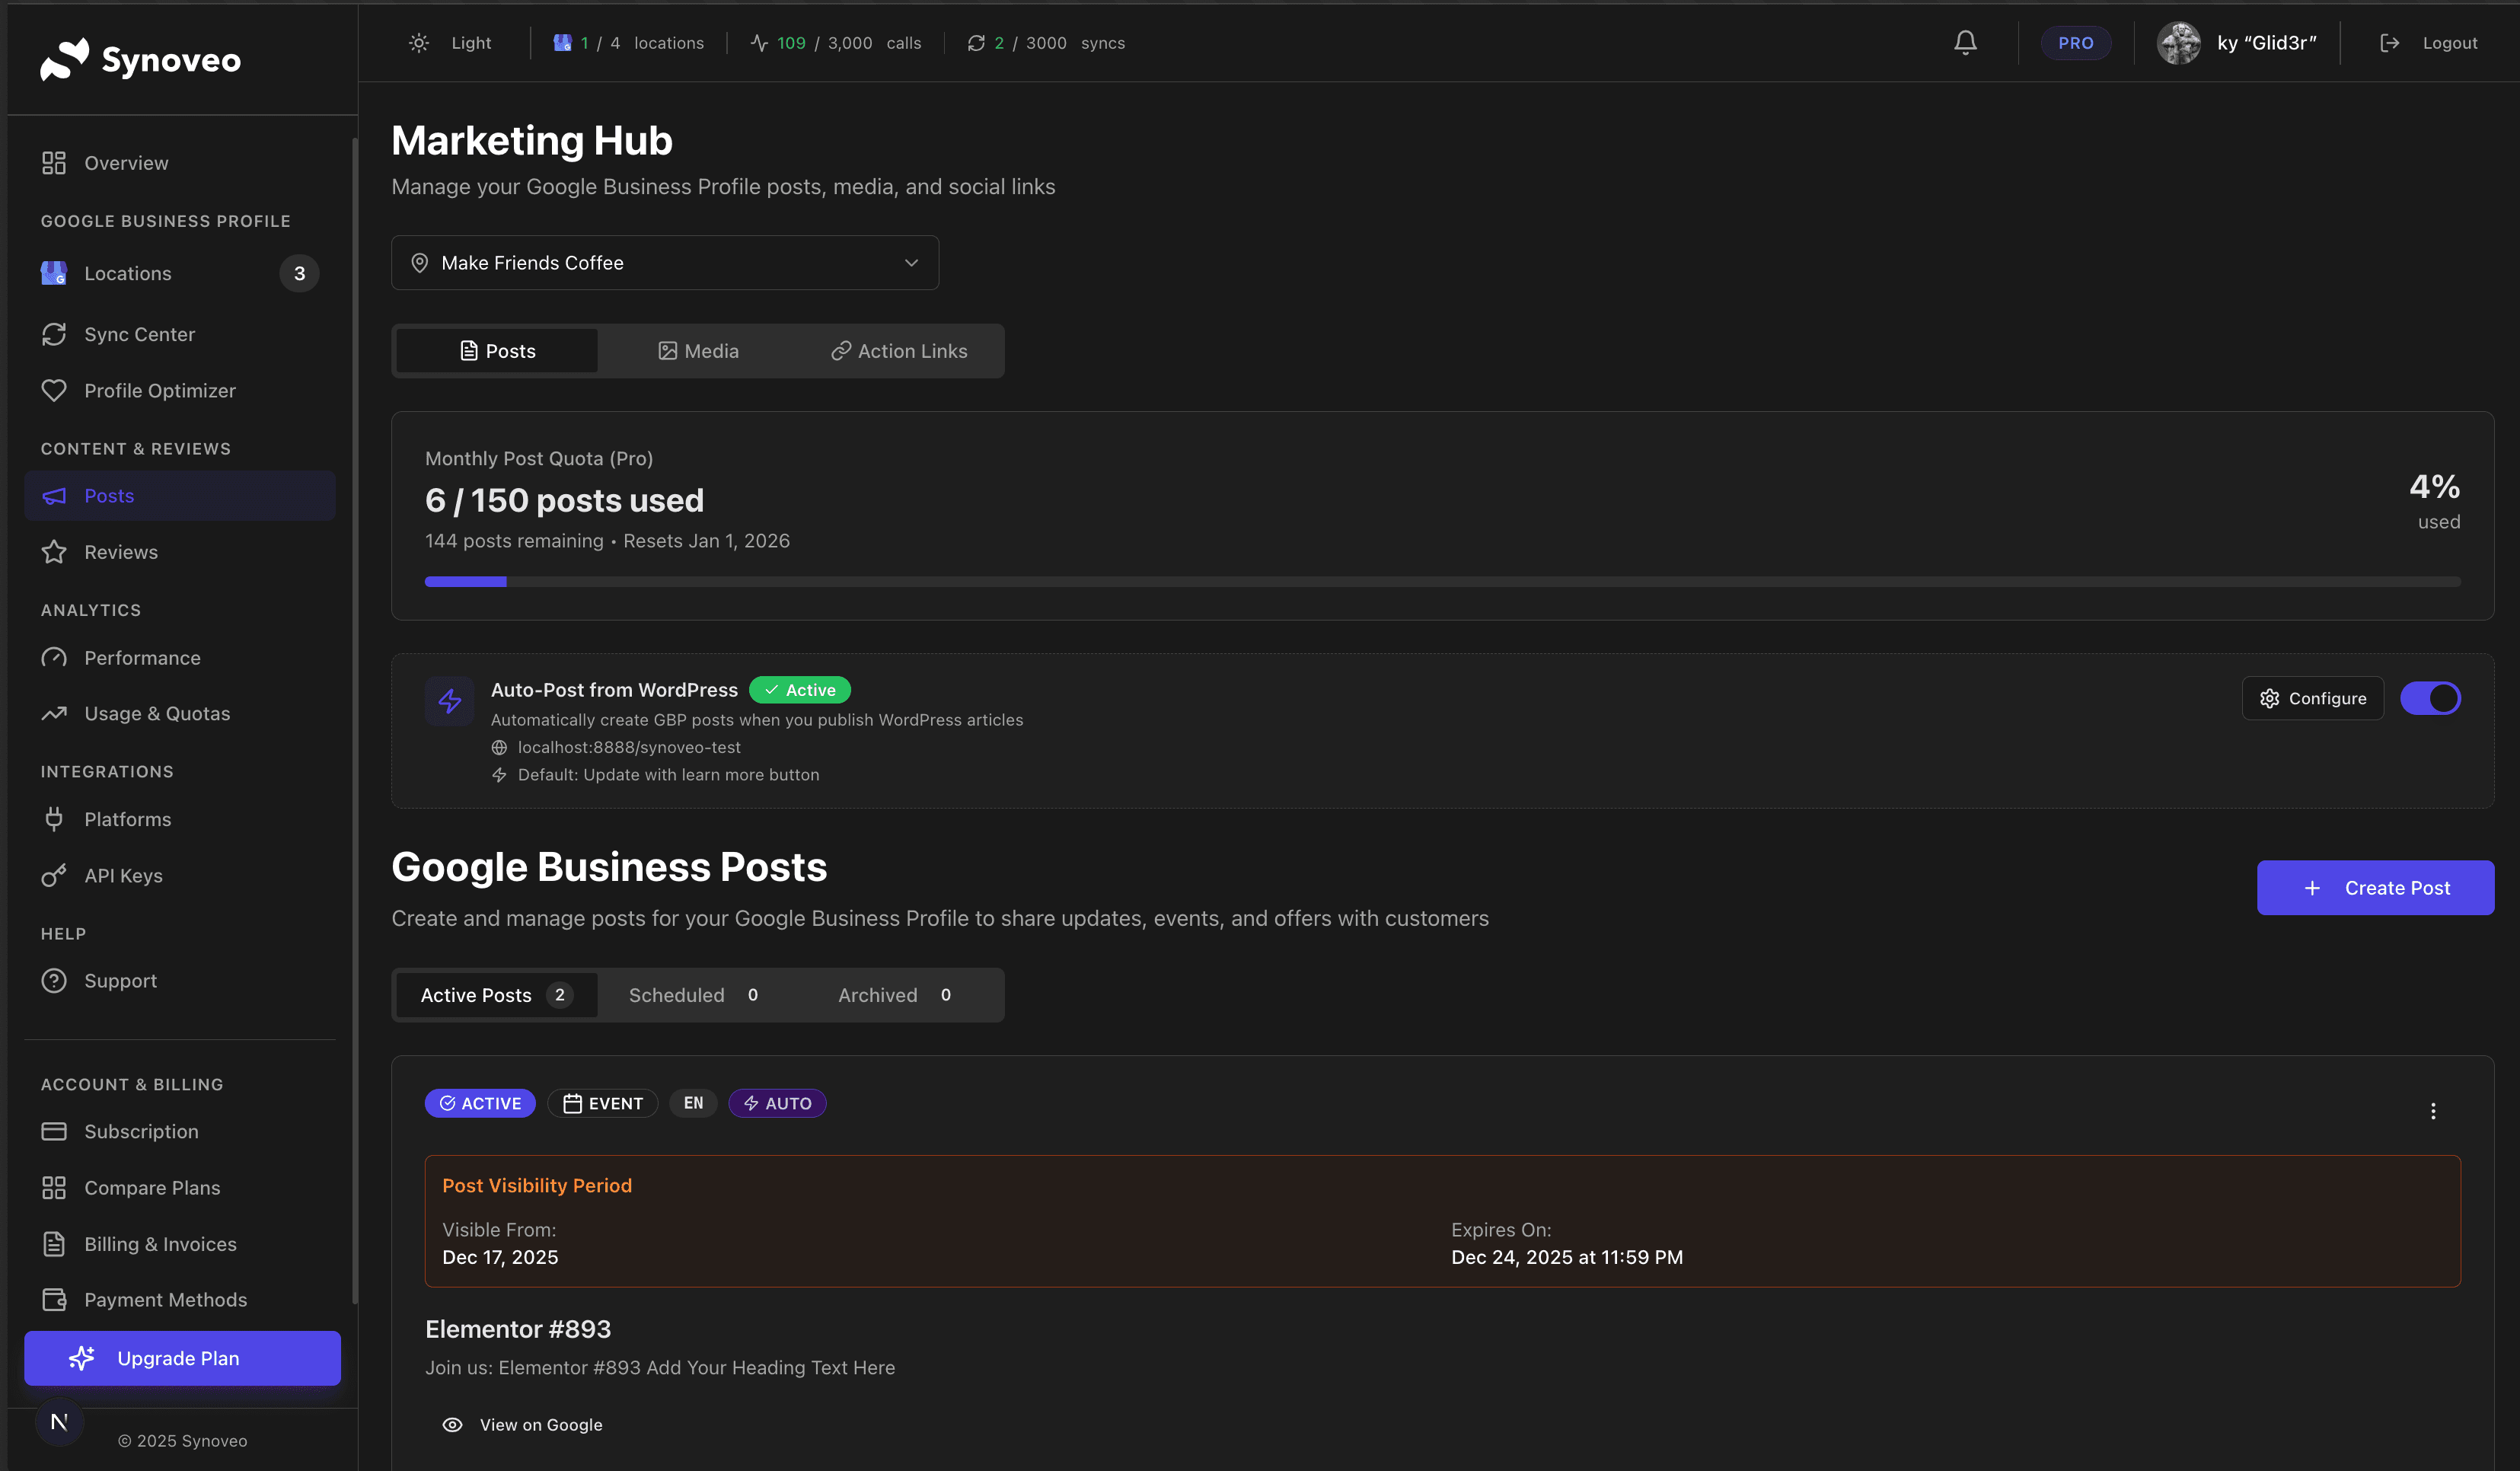
1.2 Find the Auto-Post Card
Look for the "Auto-Post from WordPress" card. It shows:
- Current status (Active/Inactive)
- Connected WordPress domain
- Current template settings

If you see "Not Available", you need to create a WordPress API key first. Go to API Keys in the Integrations section of the sidebar and create one assigned to this location.
1.3 Configure Templates
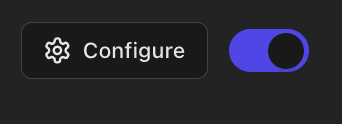
Click the Configure button to open the settings dialog.
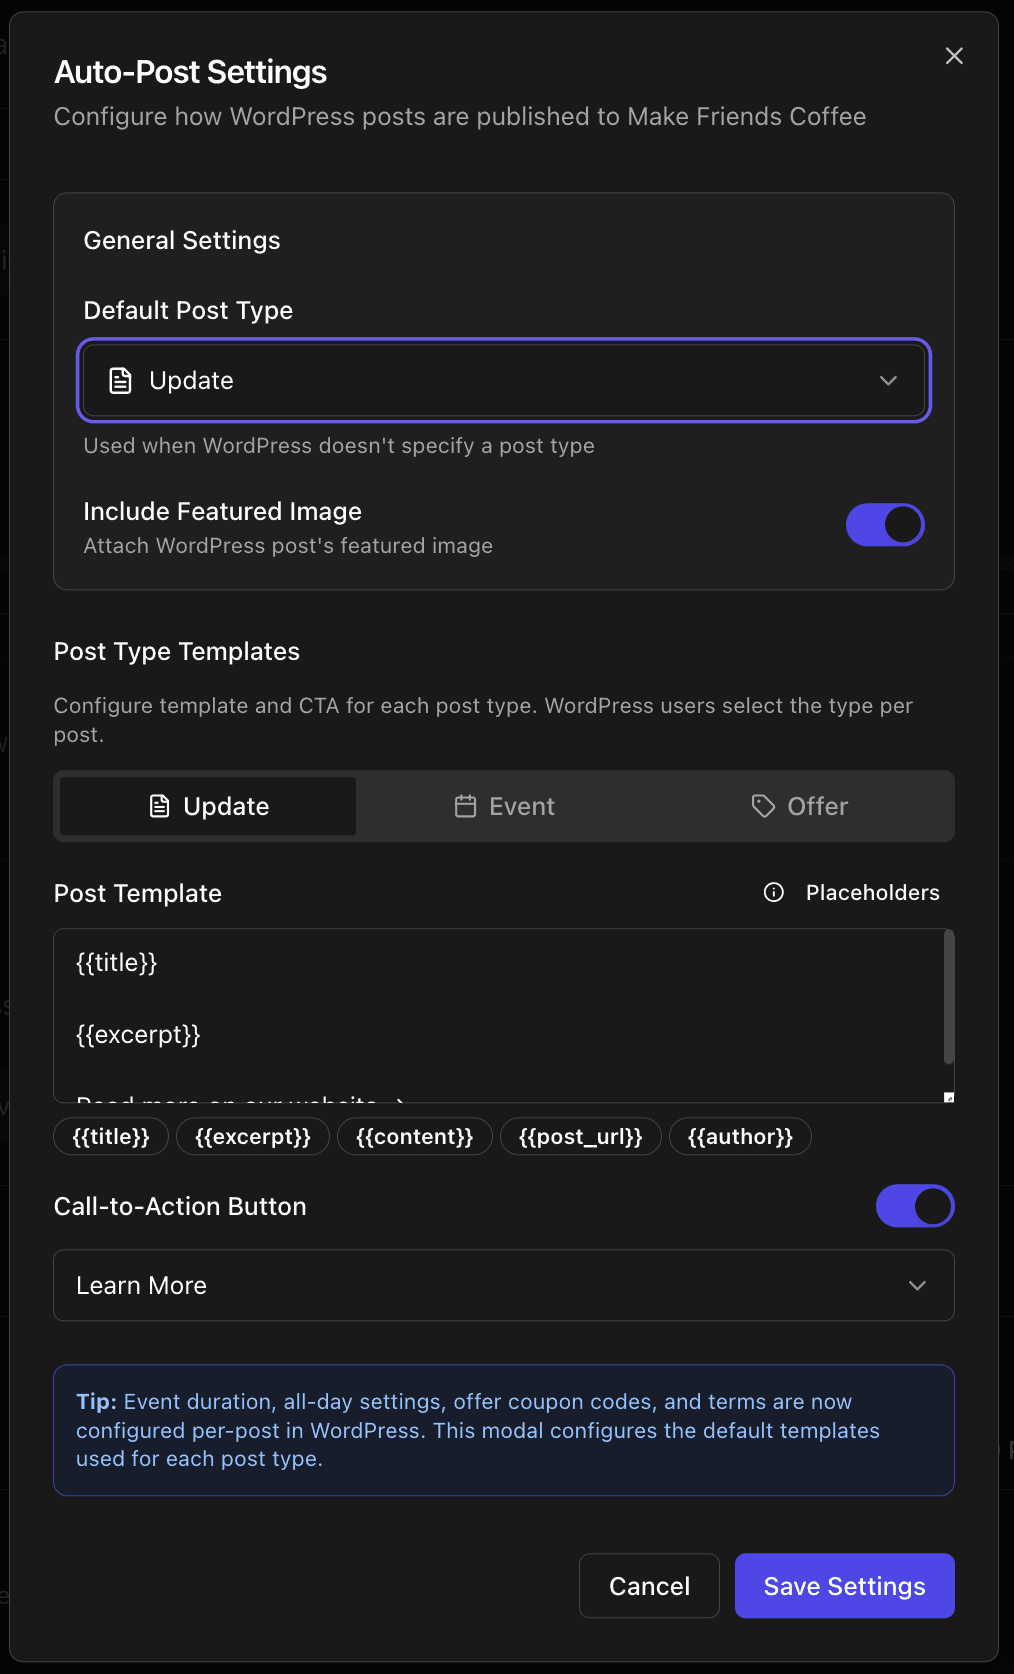
General Settings
| Setting | Description |
|---|---|
| Default Post Type | Used when WordPress doesn't specify a type |
| Include Featured Image | Attach WordPress featured image to GBP post |
Per-Type Templates
Each post type has its own template. Click the tabs to configure:
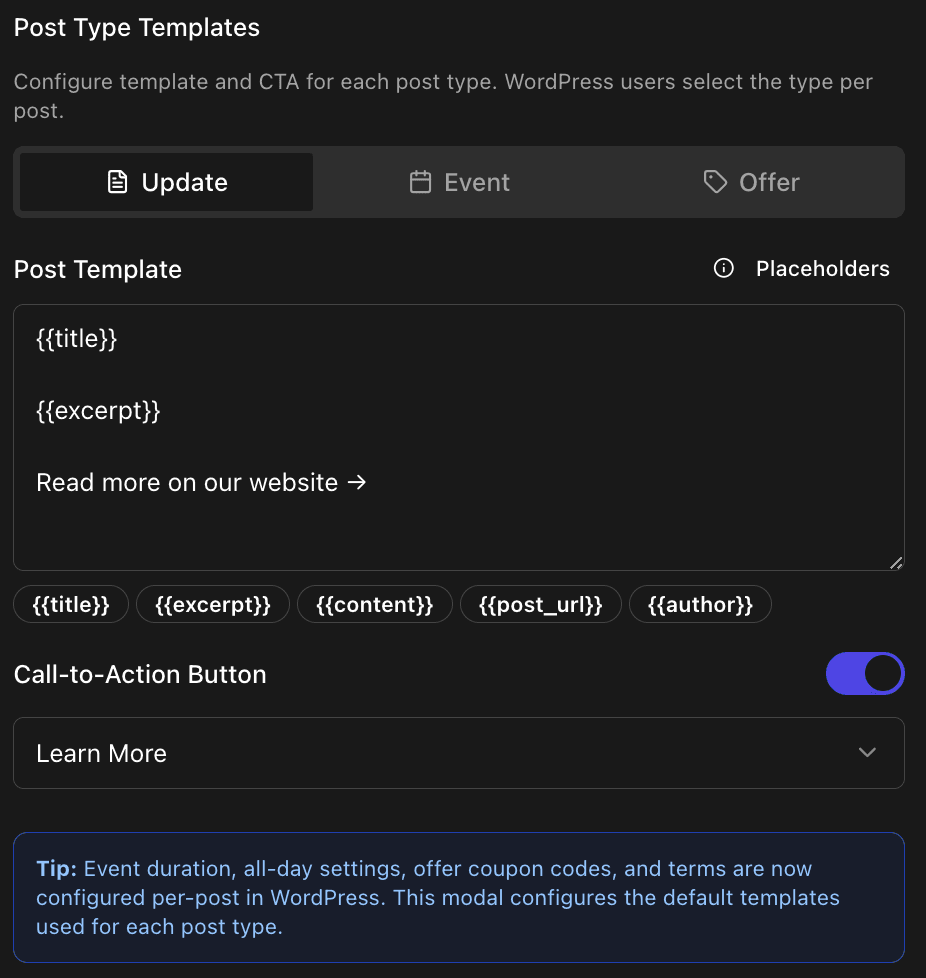
Template Placeholders
Use placeholders that get replaced with your WordPress content:
| Placeholder | Replaced With | Example |
|---|---|---|
{{title}} | Post title | "Summer Sale Announcement" |
{{excerpt}} | Post excerpt | "Don't miss our biggest sale..." |
{{content}} | Post content (first 1000 chars) | Full article text |
{{post_url}} | Post permalink | https://yoursite.com/summer-sale |
{{author}} | Author name | "John Smith" |
Example Templates
Update template:
{{title}}

{{excerpt}}

Read more on our website →
Event template:
Join us: {{title}}

{{excerpt}}

Don't miss this opportunity!
Offer template:
Special offer: {{title}}

{{excerpt}}

Limited time only. Terms apply.
Call-to-Action Buttons
Configure CTA buttons for each post type:
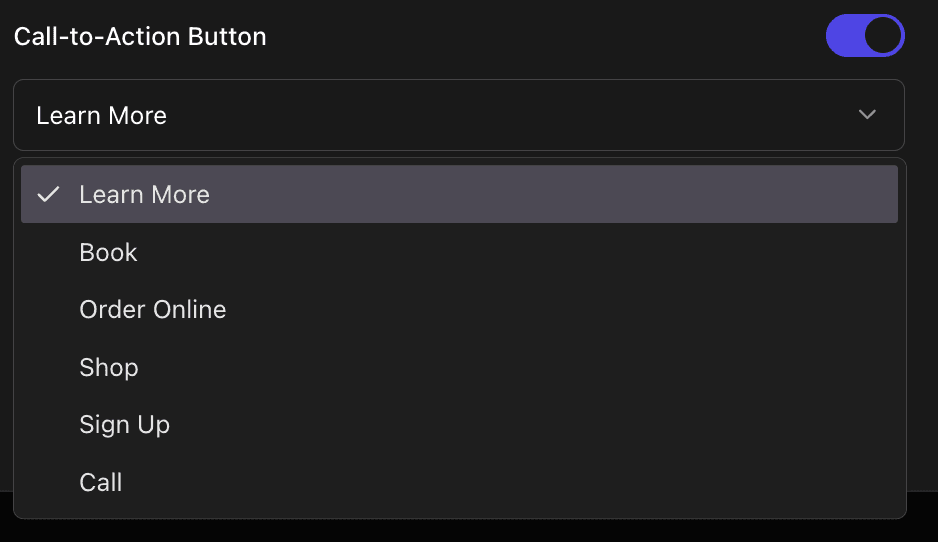
| CTA Type | Best For |
|---|---|
| Learn More | Blog posts, news |
| Book | Services, appointments |
| Order Online | Food, delivery |
| Shop | Products, e-commerce |
| Sign Up | Events, newsletters |
| Call | Service businesses |
1.4 Enable Auto-Post
After configuring templates, toggle the switch to enable Auto-Post:
Step 2: WordPress Configuration
With templates configured in the dashboard, now set up per-post details in WordPress.
2.1 Gutenberg (Block Editor)
The Synoveo panel appears in the WordPress editor sidebar.
Finding the Panel
- Edit any post or page
- Open the right sidebar (Settings panel)
- Look for the Synoveo panel below the post settings

Click on the panel to expand it:
Enabling Auto-Post
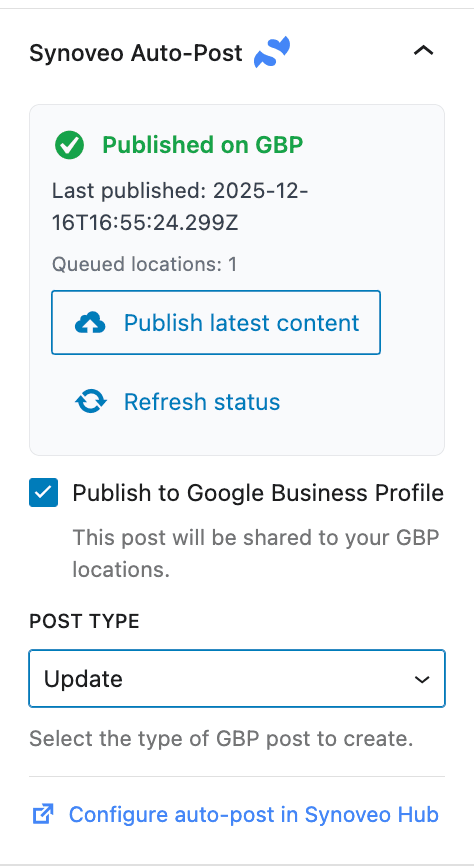
Check the "Publish to Google Business Profile" checkbox:
Selecting Post Type
Choose the type that matches your content:
Update Post - For news, announcements, and general updates:
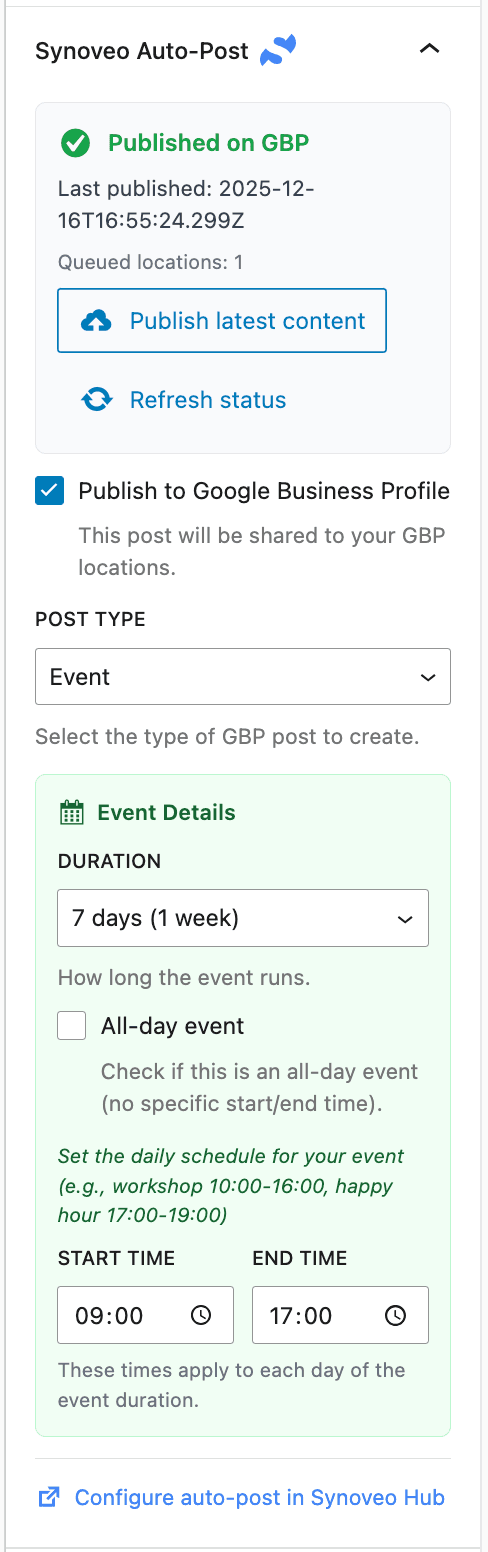
Event Post - For time-based content with schedule:
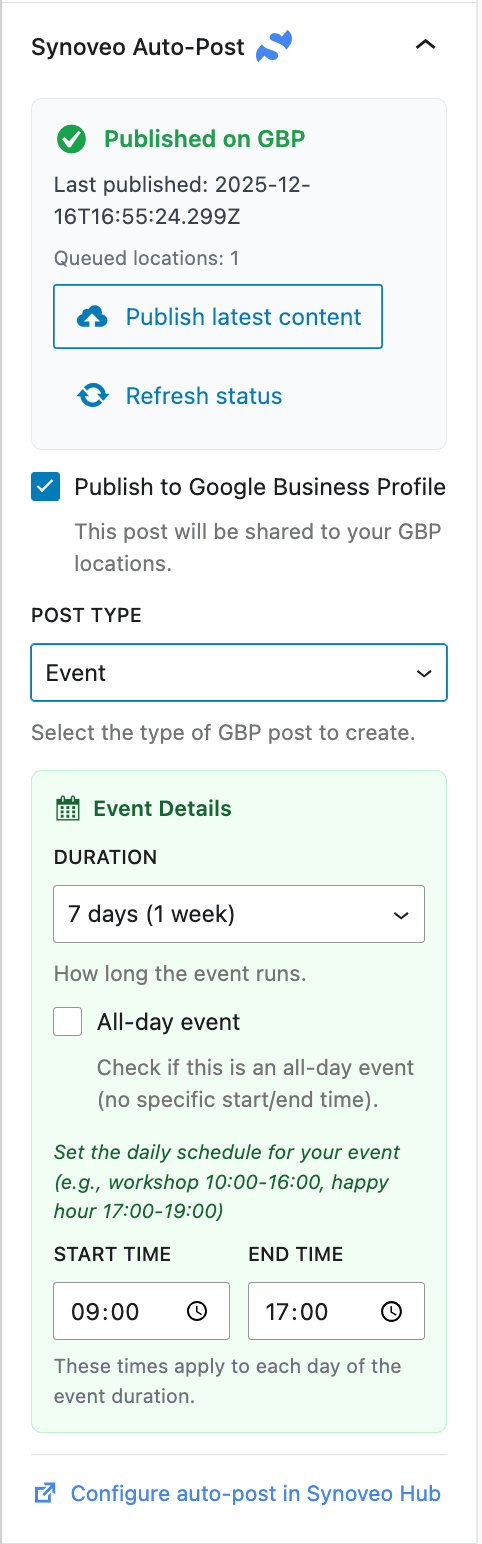
| Field | Description |
|---|---|
| Duration | How many days the event runs (1, 3, 7, 14, or 30) |
| All-day event | Toggle for events without specific times |
| Start time | Daily start time (for non-all-day events) |
| End time | Daily end time (for non-all-day events) |
The event starts on your WordPress publish date and runs for the specified duration.
Offer Post - For promotions and discounts:

| Field | Description | Limit |
|---|---|---|
| Coupon Code | Optional discount code | 50 characters |
| Redeem URL | Where customers redeem (supports {{post_url}}) | - |
| Terms & Conditions | Legal terms for the offer | 500 characters |
2.2 Elementor
Synoveo adds a custom tab to the Elementor editor.
- Edit your page with Elementor
- Look for the Synoveo tab in the left panel

The Elementor panel provides the same options as Gutenberg:
- Toggle to enable/disable
- Post type selection
- Event or Offer specific fields
How It All Works Together
Understanding the complete flow helps troubleshoot issues.
The Publishing Flow
┌─────────────────────────────────────────────────────────────┐
│  1. WORDPRESS (You write content)                           │
│     - Post title, content, excerpt                          │
│     - Featured image                                        │
│     - Select post type (Update/Event/Offer)                 │
│     - Fill in offer coupon or event times                   │
└─────────────────────────┬───────────────────────────────────┘
                          │ Publish
                          ▼
┌─────────────────────────────────────────────────────────────┐
│  2. SYNOVEO API (Merges everything)                         │
│     - Fetches your dashboard TEMPLATE                       │
│     - Applies WordPress CONTENT to placeholders             │
│     - Adds offer/event DETAILS from WordPress               │
│     - Attaches featured IMAGE if enabled                    │
└─────────────────────────┬───────────────────────────────────┘
                          │ Creates post
                          ▼
┌─────────────────────────────────────────────────────────────┐
│  3. GOOGLE BUSINESS PROFILE                                 │
│     - Post appears on your profile                          │
│     - Visible in Google Search & Maps                       │
│     - Stays for 7 days (Update) or until end date           │
└─────────────────────────────────────────────────────────────┘
What Comes From Where
| Element | Source | Example |
|---|---|---|
| Post text format | Dashboard template | Special offer: {{title}} |
| Actual title | WordPress post | Summer Sale |
| Actual excerpt | WordPress post | 50% off all items |
| Post type | WordPress (or dashboard default) | Offer |
| CTA button type | Dashboard settings | Shop |
| CTA button URL | WordPress post URL | yoursite.com/sale |
| Coupon code | WordPress per-post | SUMMER50 |
| Event times | WordPress per-post | 9:00 AM - 5:00 PM |
| Featured image | WordPress post | sale-banner.jpg |
Example: Publishing an Offer
Dashboard template (set once):
Special offer: {{title}}

{{excerpt}}

Visit our website to redeem!
WordPress post (set per-post):
- Title: "Summer Clearance Sale"
- Excerpt: "Everything must go! Up to 70% off all summer items."
- Post type: Offer
- Coupon code: CLEAR70
- Terms: "Valid in-store only. While supplies last."
Final GBP post (created automatically):
Special offer: Summer Clearance Sale

Everything must go! Up to 70% off all summer items.

Visit our website to redeem!

[Shop Now button]
Coupon: CLEAR70
Terms: Valid in-store only. While supplies last.
Viewing Post Status
After publishing, check the status in WordPress.
Status Indicators
The Synoveo panel shows real-time status:
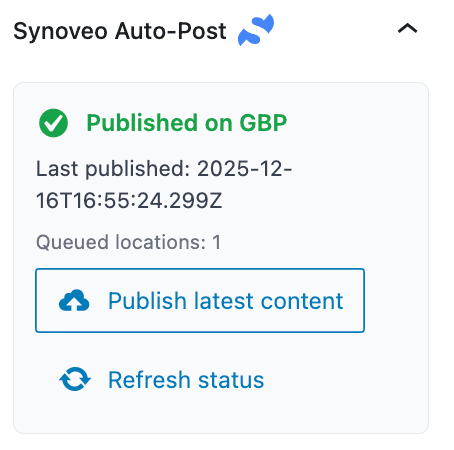
| Status | Meaning | Action |
|---|---|---|
| Published | Successfully posted to GBP | None needed |
| Pending | Processing or scheduled | Wait |
| Failed | Error occurred | Check error message |
| Never Posted | Auto-post not enabled | Enable if desired |
Retrying Failed Posts
If a post fails:
- Check the error message (hover over the status)
- Fix the issue (often quota or connection)
- Click Retry to attempt again
Updating Existing Posts
When you update a WordPress post that was already auto-posted:
- Make your changes in WordPress
- Click Update/Publish
- Synoveo will:
- Delete the old GBP post
- Create a new one with updated content
GBP doesn't support editing posts, so Synoveo recreates them. This resets engagement metrics.
Monthly Quota
Auto-posts count toward your monthly GBP post quota:
| Plan | Monthly Posts |
|---|---|
| Solo + Engagement | 5 |
| Pro | 50 |
| Business | Unlimited |
Posts are counted when successfully published. Failed posts don't consume quota.
Troubleshooting
"Auto-Post Not Available"
Cause: No WordPress API key assigned to this location.
Fix:
- Go to API Keys in the Integrations section of the sidebar
- Create a new WordPress API key
- Assign it to your location
"Post Failed to Publish"
Common causes:
| Error | Solution |
|---|---|
| Quota exceeded | Upgrade plan or wait for next month |
| Google not connected | Reconnect Google in Settings |
| Location not verified | Verify location in Google Business |
| Sync disabled | Enable sync for this location |
"Image Not Included"
Requirements for images:
- Featured image must be set in WordPress
- Format: JPEG or PNG only
- Minimum size: 400x300 pixels
- Must be publicly accessible URL
- "Include Featured Image" enabled in dashboard
"Content Truncated"
GBP has limits. If content is cut off:
- Use shorter excerpts in WordPress
- Template + content must be under 1,500 characters
- Event titles limited to 58 characters
"Wrong Post Type"
Posts appearing as wrong type:
- Check WordPress post type selection
- If not set, dashboard default is used
- Update WordPress post and republish
Best Practices
For Admins (Dashboard)
- Keep templates simple - Let WordPress content speak
- Use placeholders - Don't hardcode content in templates
- Test with one post - Verify templates before going live
- Set sensible defaults - Most posts will be Updates
For Editors (WordPress)
- Write good excerpts - These become your GBP post text
- Always set featured image - 2x more engagement
- Choose correct post type - Offers need coupon fields
- Keep titles short - Google truncates long titles
- Check status after publish - Catch failures early
Content Tips
| Do | Don't |
|---|---|
| Use clear, actionable language | Use vague descriptions |
| Include a call-to-action | Forget to tell people what to do |
| Add relevant images | Use generic stock photos |
| Keep it timely | Promote expired offers |
| Write for local customers | Use jargon or technical terms |
FAQ
Can I disable Auto-Post for specific posts?
Yes. In the WordPress editor, uncheck "Publish to Google Business Profile" for that post.
What happens when my WordPress post expires?
GBP posts are independent. You'll need to delete them separately from the dashboard or let them expire naturally.
Can I auto-post to multiple locations?
Yes. Enable Auto-Post for each location separately. Each can have different templates.
Do drafts get auto-posted?
No. Only posts with "Published" status trigger Auto-Post.
Can I schedule auto-posts?
Yes. Schedule your WordPress post for a future date. When it publishes, Auto-Post triggers automatically.
What if I don't have an excerpt?
Synoveo uses the first 1,000 characters of your post content as a fallback.