WordPress Plugin
Installation
How to install the Synoveo WordPress plugin
Install the Synoveo plugin to start syncing your WordPress data to Google Business Profile.
Method 1: WordPress Plugin Directory (Recommended)
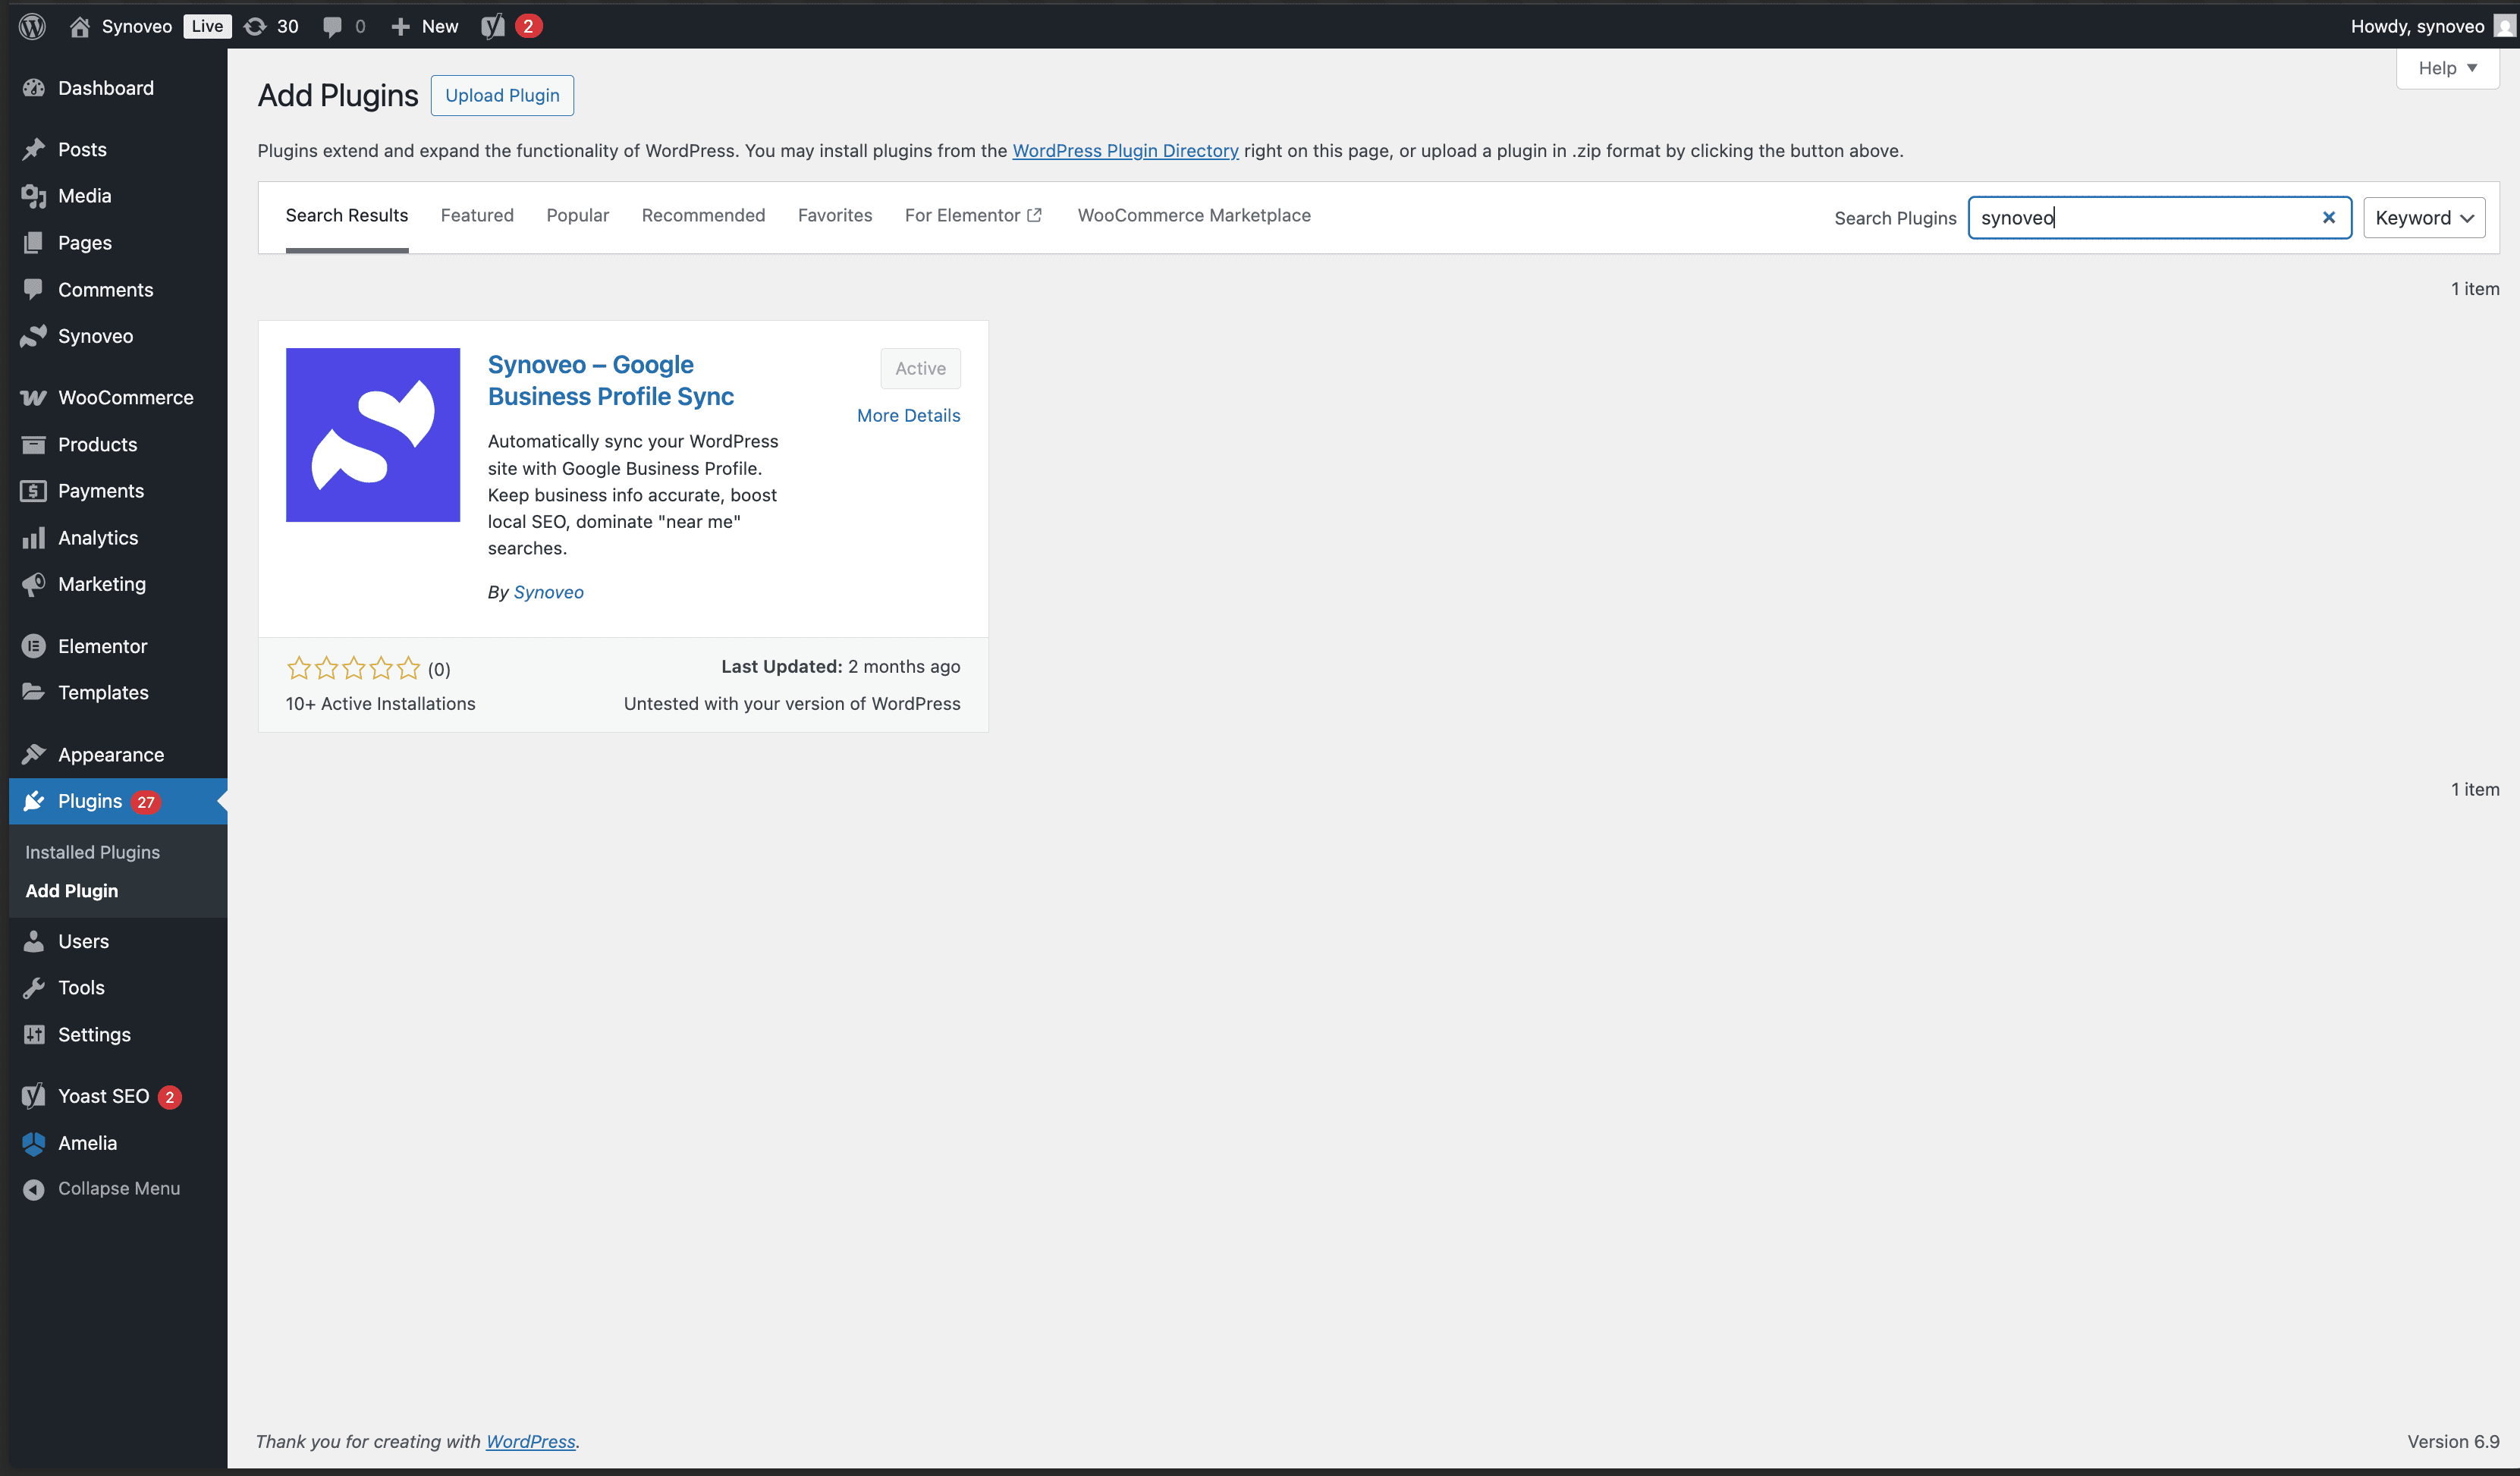
Search for Synoveo
In your WordPress admin, navigate to Plugins → Add New and type "Synoveo" in the search box.

Method 2: Manual Upload
If you have a ZIP file:
Go to Plugins
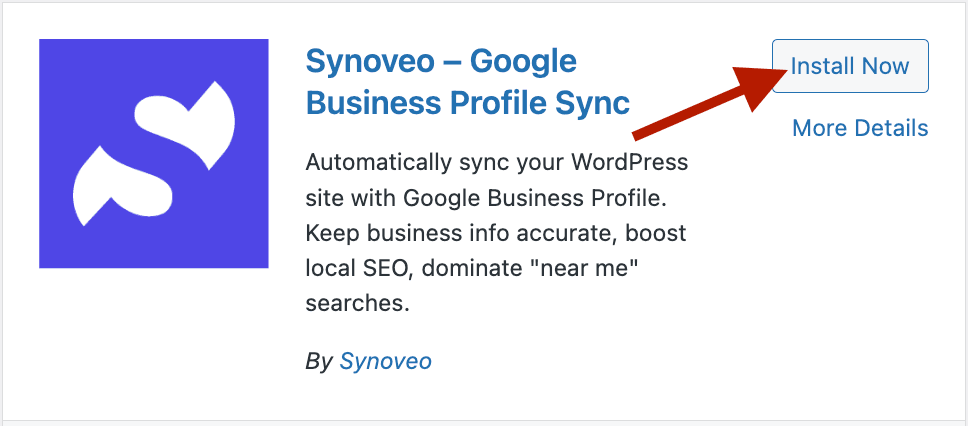
Navigate to Plugins → Add New → Upload Plugin
Upload
Choose the synoveo.zip file and click Install Now
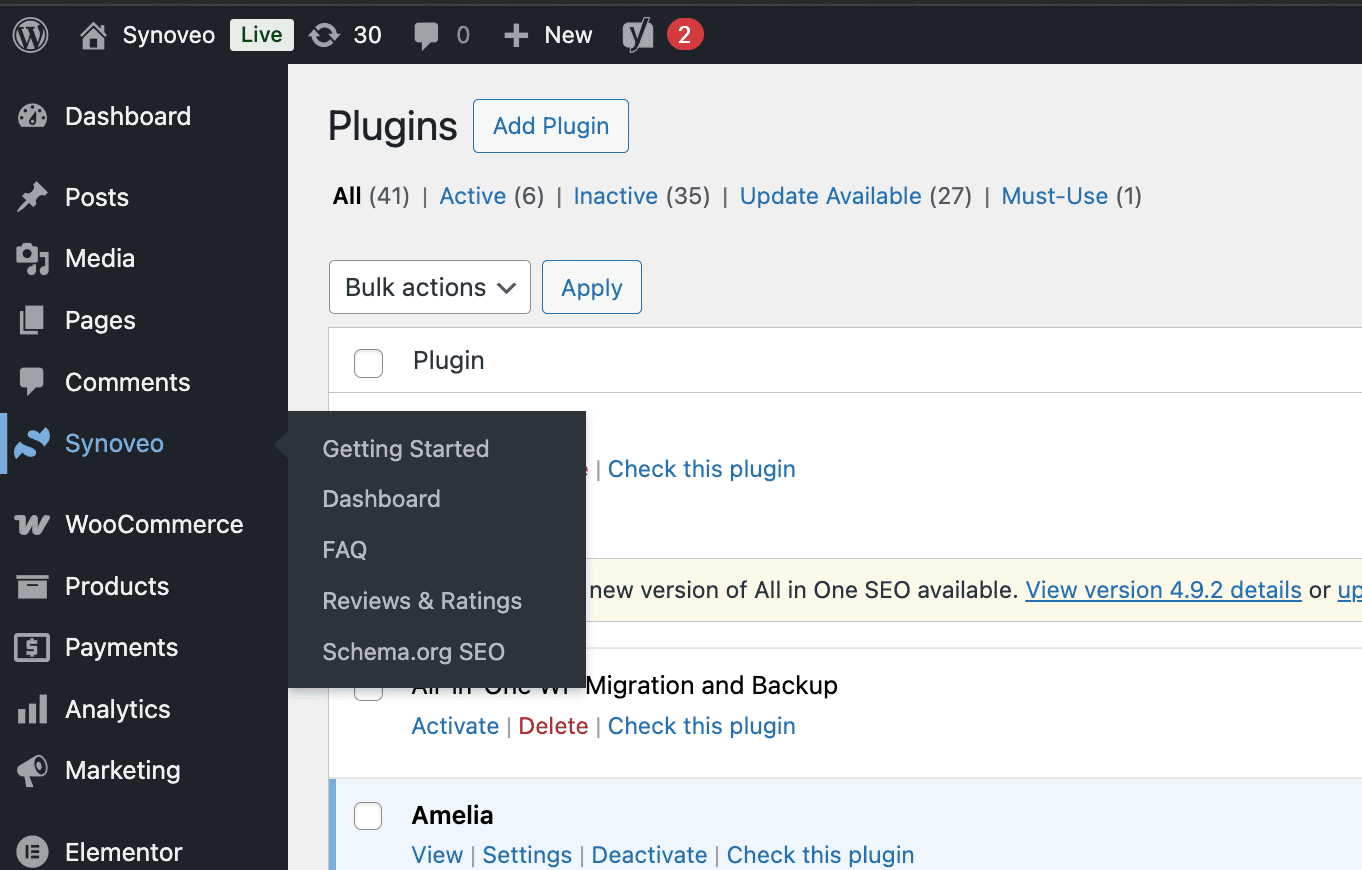
Activate
Click Activate Plugin
Method 3: FTP/SFTP
For advanced users:
- Extract
synoveo.zipto your computer - Connect to your server via FTP/SFTP
- Upload the
synoveofolder to/wp-content/plugins/ - Go to Plugins in WordPress admin
- Click Activate on Synoveo
System Requirements
| Requirement | Minimum | Recommended |
|---|---|---|
| WordPress | 5.8+ | 6.0+ |
| PHP | 7.4+ | 8.0+ |
| MySQL | 5.7+ | 8.0+ |
Verify Installation
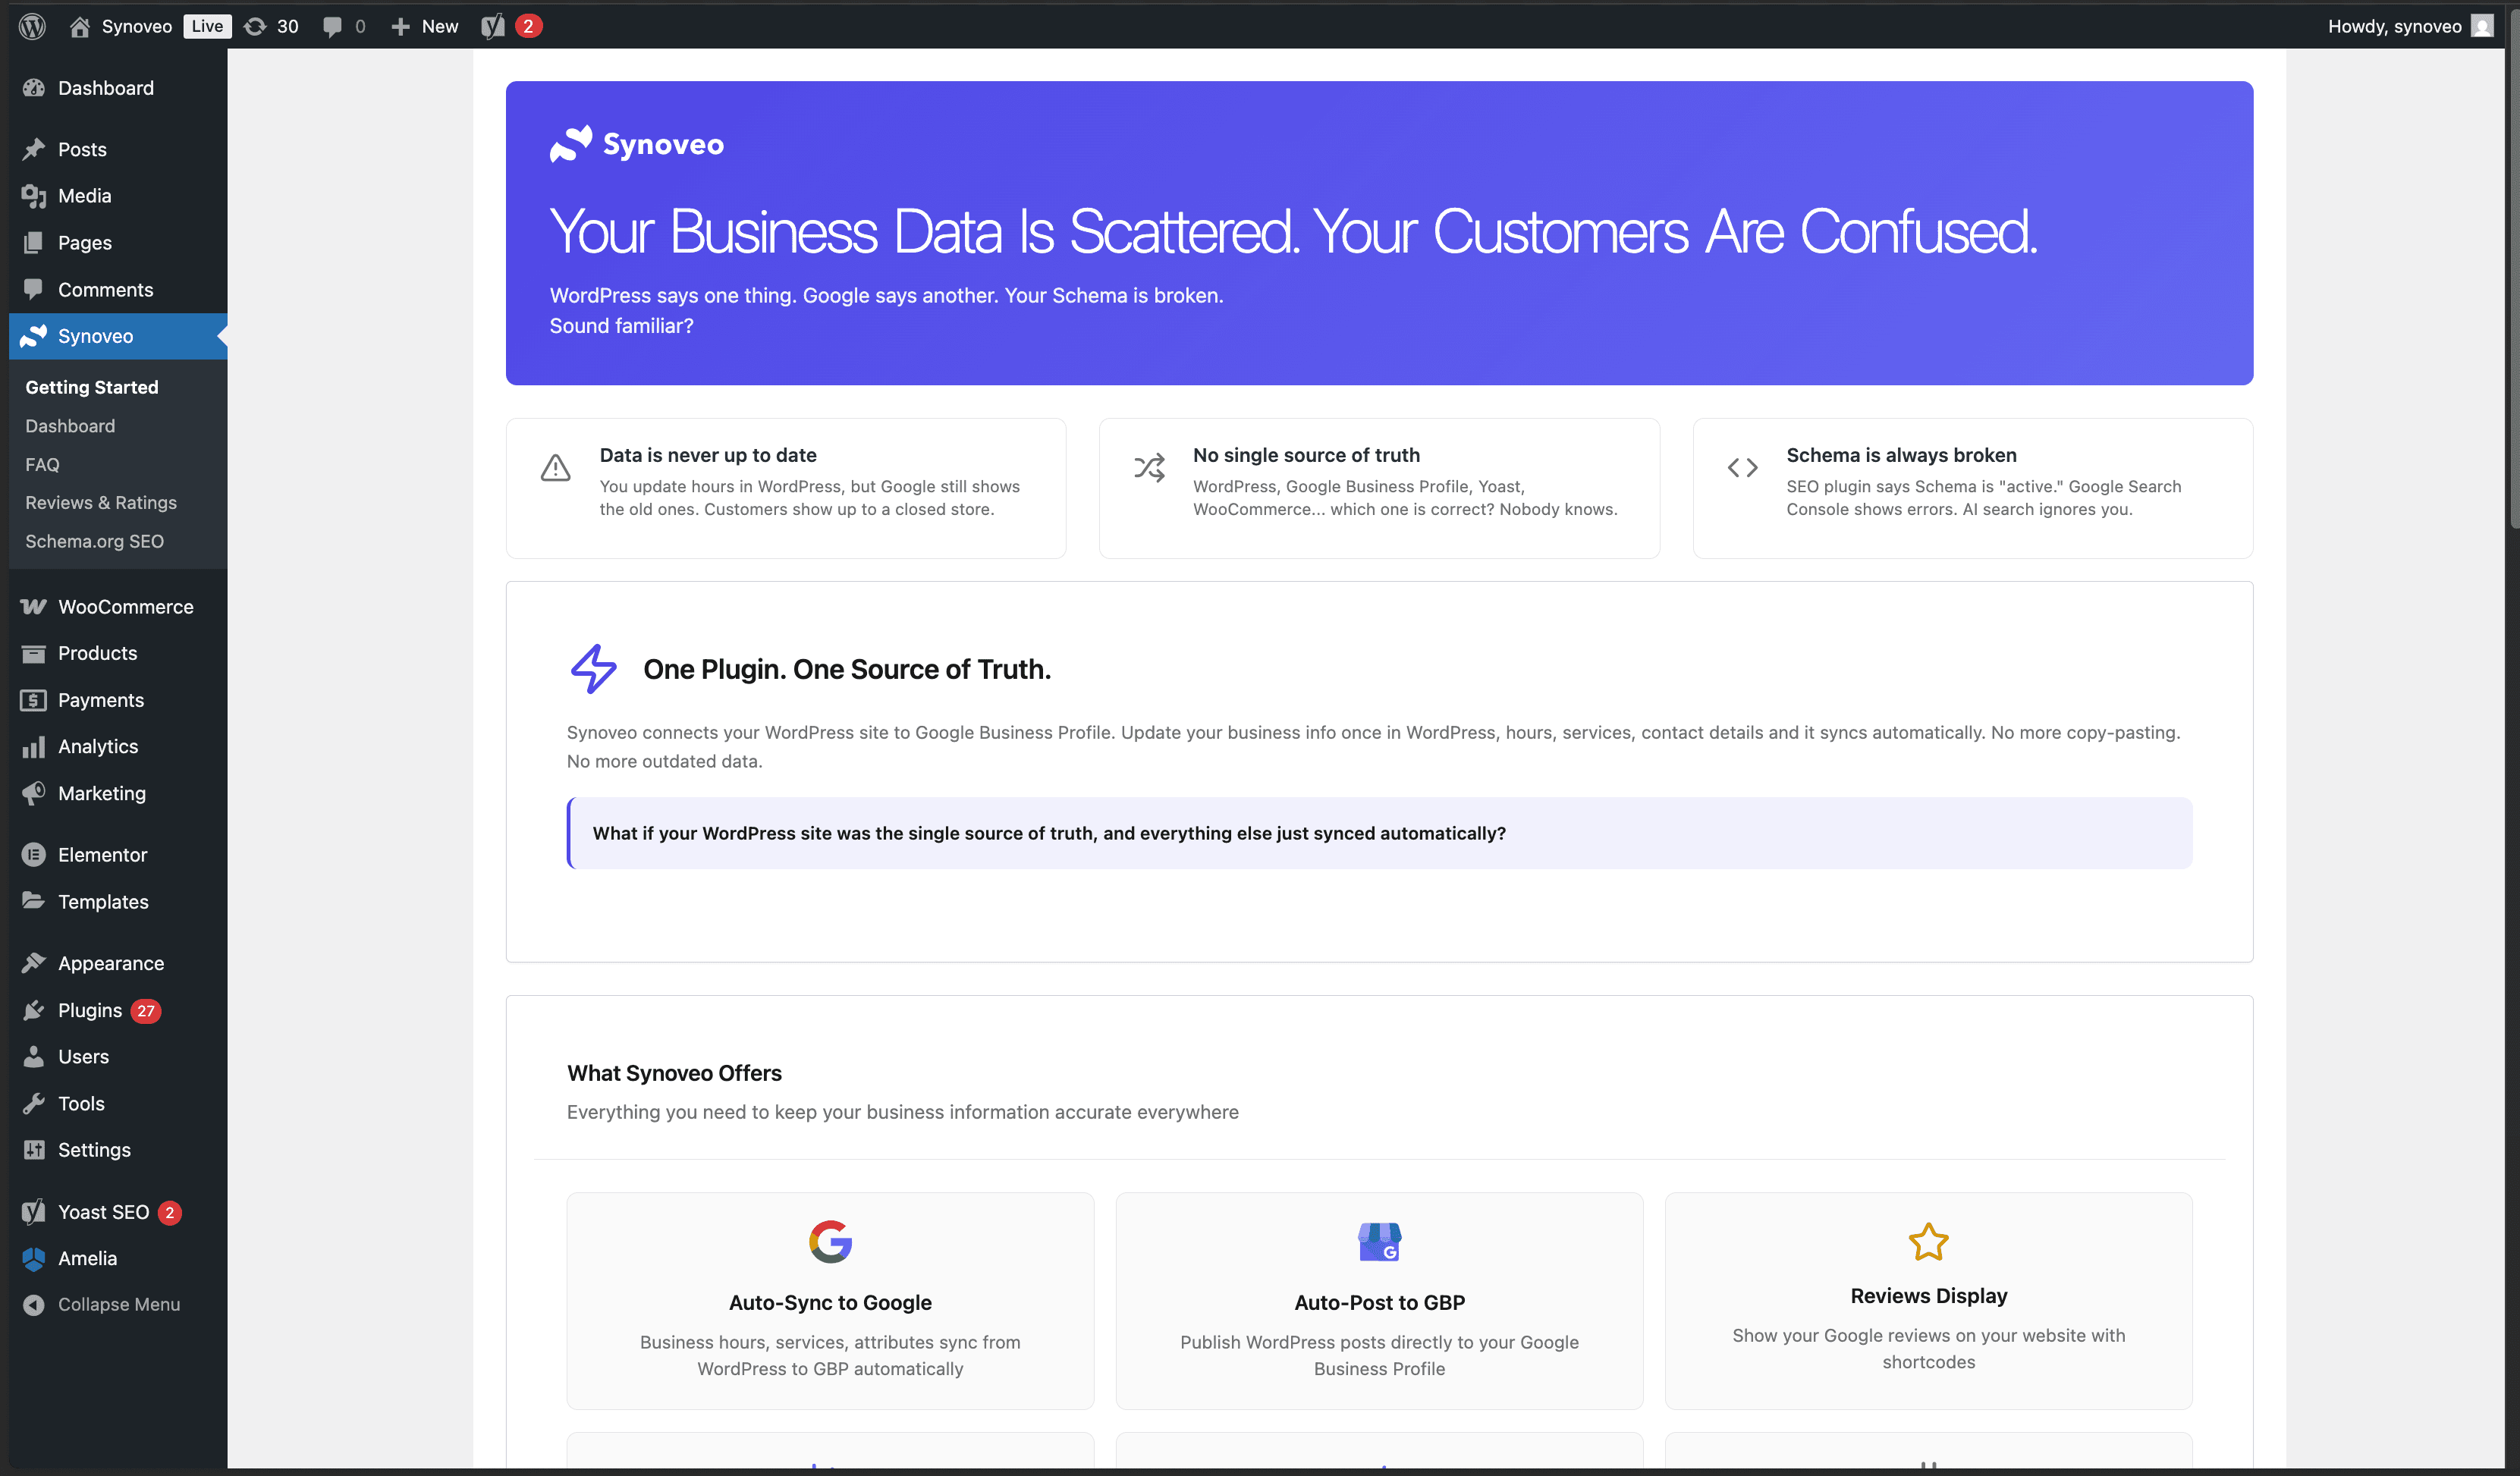
After activation, you should see the Synoveo menu item in your WordPress admin sidebar.
Clicking on Synoveo will take you to the Getting Started page where you can learn about features and begin setup.
If you don't see the Synoveo menu, try deactivating and reactivating the plugin, or check for PHP errors in your server logs.